Now, I struggled with this one for a while. I was able to get the IPC 4.0 files that include the stand alone version of the SCE UI. I recently learned that in all the versions after 4.0, this option is no longer available. So, to me, 4.0 is still a premium, just to be able to do the offline testing of a model (especially for someone that periodically travels on airplane. ha ha ha). Anyway, after some digging, I was finally able to figure out how to get this installed. If you’ve read my previous posts on the SSC installation, you’ll remember that you need SQL Server on your local machine in order to make this work. Please refer back to this post if you are having issues connecting.
Now, the first thing you need before you can do anything is set the system variable for JAVA_HOME. If you aren’t familiar with this, following the next couple of steps.
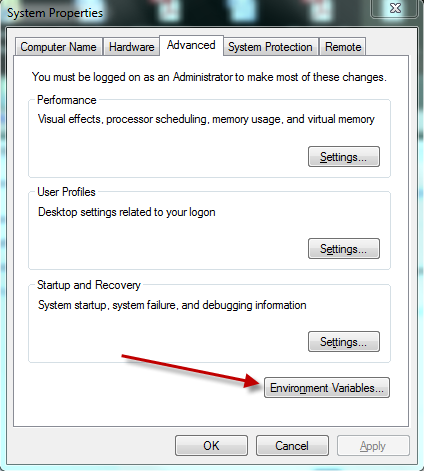
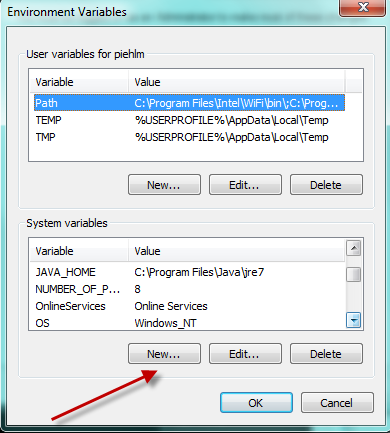
Right click on my computer, and select properties. If you are in windows 7, click the advanced system settings, and press the environment variable button.
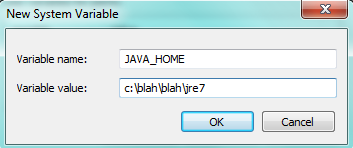
The variable name needs to be: JAVA_HOME
the value is the path on your hard drive to get there.
Now, once you have this, you can move on to the harder pieces.
The next thing you need to do is locate the files for the ipc, and go to the /bin directory. This will have a bunch of batch files. The first file you need to execute is: admin.bat
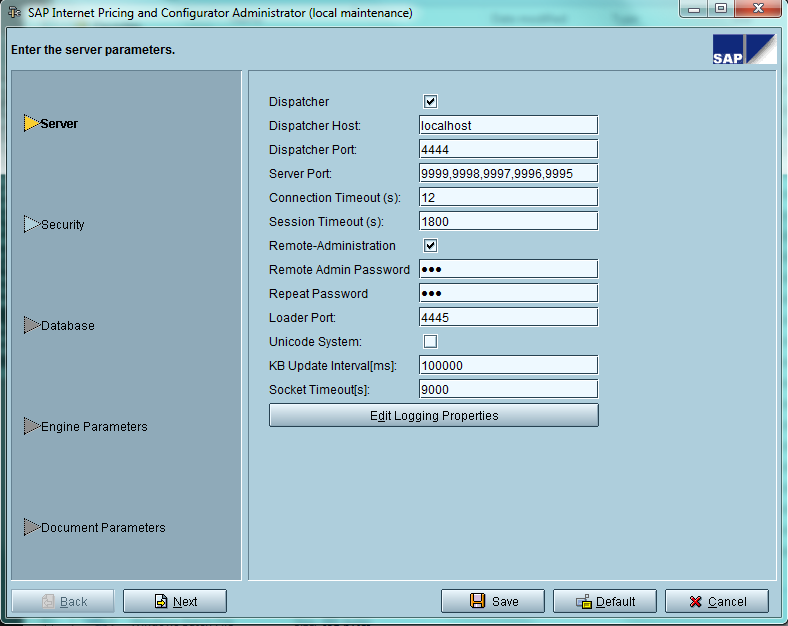
The first screen, you can leave this defaulted as it is. This would be more important if you wanted to connect directly to R/3 or CRM. Go ahead and press Next. and then Next again, since you don’t need to worry about security on your local machine 🙂
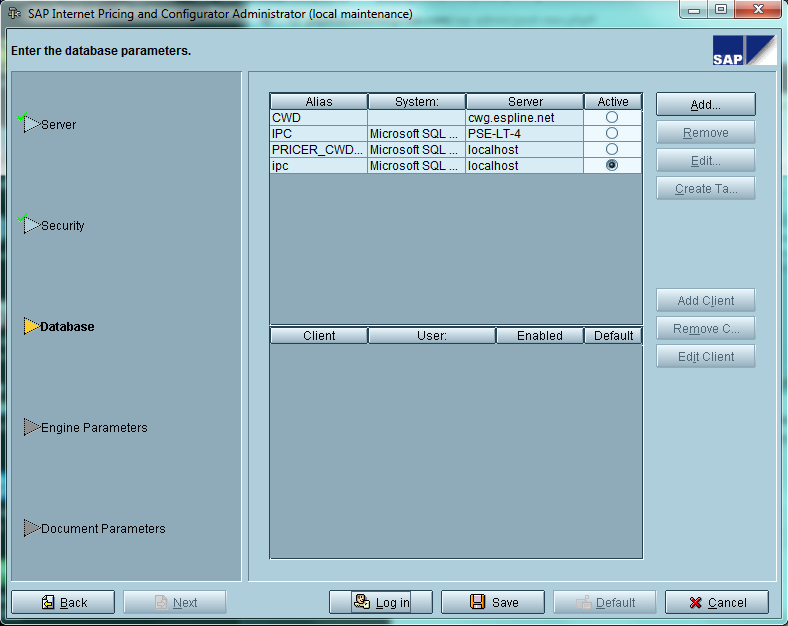
this screen is where all the work comes in. Press add to add a new connection
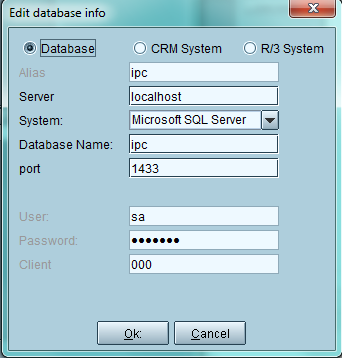
Now, all of these values will come from the SQL Database you created. See SSC installation for more details. Be sure to create a new database, I called mine IPC. Then populate all the other values. The Port you can accept the default, for Client, you can just use 000 since it’s local.
Finally, make sure to highlight the new DB you added, and press the Create Tables button. Then press save.
I’ll take more about this soon, including how to upload a model into the stand alone database.
Thanks for reading,
As always, thanks for reading and don't forget to check out our SAP Service Management Products at my other company JaveLLin Solutions,Mike

