VC

Home / SAP / Archive by category "VC" (Page 2)

Variant Configuration – Using CCUNDO

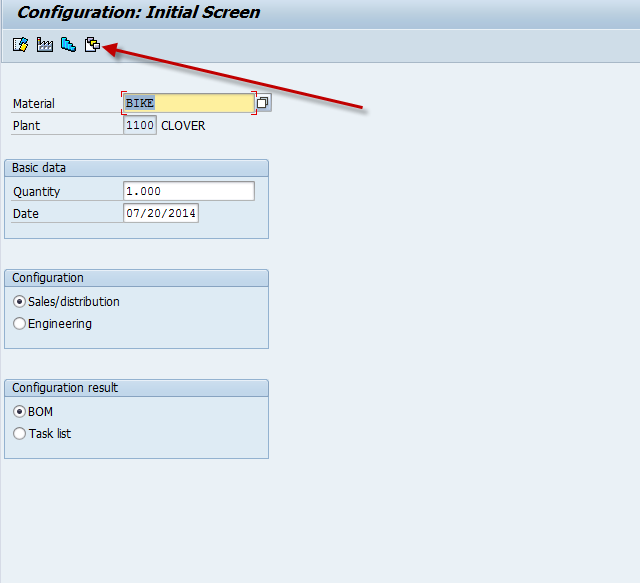
Well, I recently ran into a case that I needed to pull this old trick out of the archives.  It had been so long, that I needed to go to the CWG and look around to remember what it was.  It’s transaction CCUNDO. A rather handy transaction when you use VC and engineering change management together.  CCUNDO allows you to remove VC items like object dependencies, classes, characteristics, etc. from a change number.  For those of you familiar with ECM, you probably remember that you can just break the link by going into CC02.  CCUNDO allows you to select the items you need to remove from the change number, and magically, the change number link is gone.

Now, there are 2 major scenarios I use this transaction for.  The first and most common is a mistake.  I typed in the wrong change number when I went to change “X”.

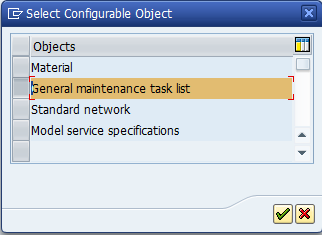
The 2nd is also a mistake, but sometimes it’s a mistake from long ago.  In VC world, inevitably an object will be created without ECM, then later, an ECM gets attached to it.  Normally, this isn’t a huge deal, until you need to do something like add a new characteristic to a variant table, or change the value assignment alternatives to a table. These things can only happen when you lock everywhere the table is used.  And if you use ECM, it has to be locked throughout history.  If you created a dependency or constraint without a change number, but then added ECM later.  There will always be a date period from 00/00/0000 until the first change number was applied that you can never again touch.  Making it impossible to update that table.  Before CCUNDO, the only option was to create a brand new table and change everything over.  While this isn’t the end of the world, it sure is easier to just continue using the original table.  In this case, you use CCUNDO to remove ALL change numbers from the object, thus getting it back to a state of never being under ECM.  Then you can either delete the object and create it with ECM, or just reset it back with the latest change number.

Now one of the biggest things to keep in mind is that I do NOT encourage this to be used in production for anything other than scenario 1.  In scenario 2, you are likely to lose ALL your history on these objects.  Again, not the end of hte world, but having this history is the whole reason you use ECM.

Thanks for reading,

Variant Configuration – Unit Testing the model

Well, it recently came to my attention that when it comes to testing a model, it might not be obvious to everyone some of the cool tools available within in CU50.  While the seasoned veteran may find this obvious, as you learn VC there are always tricks that can make your life easier.  Today’s post is no exception.  Today we’re going to talk about the configured objects button with in CU50.  I’ll confess, this was a button that I knew little about for some time.  But of late, this has become one of the most useful testing tools when sales orders/production orders are generated.

blog02-01

Now, if you don’t recognize the name of the button, this screenshot should refresh your memory, even if you never knew what the button did :).

blog02-02

Now, this little feature is outstanding.  You can enter in a sales order or production order (material is for material variants, but you don’t need to enter this screen to see those.).  By entering this information into this screen, CU50 will bring in the complete configuration from the document, in this instance the sales order.

blog02-03

As soon as you hit enter, the standard CU50 screen will return, but you now get an extra Copy from: section to show you exactly what you’re copying from.

blog02-04

Once you enter the configuration screen, you can see all the characteristic values populated.  Now, this is especially valuable when dealing with sales relevant and production relevant items in the same BOM.  You also have the ability to see the configured routing.

While you can see bits and pieces by looking at the sales order, you often must see both a sales order and production order to see the entire picture.  CU50 gives you everything, and now you don’t even need to copy each and every value.

Hope you find this valuable and thanks for reading,


Variant Configuration – ALE Constraints with ECM

I’ve recently run into a strange issue when I ALE constraints with ECM.  I’ve been finding that in some situations, the constraints are properly sent to the target system, the syntax check out, but for some reason, they never fire.  No good explanation of why.  I feel like this happened to me in the past, but I’m guessing I never got a good explanation then either, since I don’t see anything in my notes.

The only work around I’ve found for this issue is to make a simple change (can even just be a comment or a space) and save it in the source system.  Then go back to CUK2 and ALE it again to the target system using the latest change number.

Suddenly, after doing this, the constraint fires again with no issues.  If you’ve seen this issue in the past, and can explain why it happens, please comment.  I’d love to know the underlying issue behind this, so I can at least understand why it happens =)

thanks for reading,

Variant Configuration – ALE Classes with Change Numbers

I recently ran into a minor little glitch when I needed to ALE Classes with change numbers.  It’s interesting, because the header of the class behaves differently than you would expect.  For example, if you pull up any class type 200 or 300, there is a valid from date that is automatically defaulted as today’s date.  Now, normally, this makes no difference.  However, when you’re in the midst of transferring models to a new system that is under engineering change management, you could begin using a change number with a date that is effective BEFORE the valid from date of the class.

So, here’s what happens.  Your class has a valid from date of today.  Your ECM has a valid date of yesterday.  When you transfer the classes with ALE, it will move the general tab (description, valid from date, etc.) and it will NOT be under engineering change management.  Now, the ALE will fail at the characteristics because those are under engineering change management AND the class valid from date is set in the future of the ECM date…  follow me so far???

Well, after all of this, there is a simple fix.  In your target/source system, simply change the valid from date of the class you are having issues with.  Remember, to make this change, you don’t need a change number.  You can simply change the date, and reprocess your IDOC’s.  Problem solved.

Thanks for reading,

Service Management – Configurable Service Revisited

Well, after discovering the whole deal with configurable service, I just couldn’t leave it alone.  I had to keep digging until I could find the scenarios that work…  at least out of the box.  Here’s what I discovered.

Scenario Configurable Service Product Maintenance Task List w/Configurable Profile Task list is “configured”
IW31 – Manually create the service order  YES  YES  YES
 IW31 – Manually create the service order  NO  YES  YES
 IW31 – Manually create the service order  YES  NO  YES

So there you have it.  If you manually create your service orders, things are great.  Now, unfortunately, things get more complicated as soon as you put a repair sales order into the mix.

Scenario Configurable Service Product Maintenance Task List w/Configurable Profile Task list is “configured”
Repair Sales Order – when the requirement type generates the service order (field service)  YES  YES  YES
Repair Sales Order – when the requirement type generates the service order (field service)  NO  YES  No
 Repair Sales Order – when the requirement type generates the service order (field service)  YES  NO  No

So, in the event where either the material requirements type, or the item category requirements type generates the service order directly, you can make it work.

Now for the bad news…  no matter what I tried, I could not make the in-house repair scenario work.  I believe this has to do with the their not being a direct connection between the service order and the configured item on the sales order.  Since a sub-item generates the service order, I believe this means the configuration doesn’t get properly passed to the service order.

Now, there is one work-around to this, but it’s far from ideal.  If you do NOT connect the configurable general maintenance task list in TXN: OISD, and you manually add it the service order, the configuration can then be entered manually onto the service order.

Now, I’m still curious, so I’m going to continue digging.  I haven’t located where the configuration resides yet in the service order.  I believe if I can determine this information, I can come up with a way to automate this issue.  Looks like a new addition to Renovation will be coming soon if I can figure out how to make it work 🙂

Anyway, hope you found this as interesting as I did.

Thanks for reading,


Service Management – Configurable Service

Not long ago, someone asked me about configurable service.  Well, naturally, this peaked my curiosity.  After all, my two specialties are Variant Configuration and Service Management.  Now, I’ve always known that you could make a DIEN configurable, but as far as I knew, you could use it for pricing and classification, but that was about it.  So I decided as soon as I got some time, I’d do some digging into this.  Well, I finally got around to that digging, and was pleasantly surprised, and as so often happens, it was a mixed success.  So, let’s talk about the good part.

With some digging, and some experimentation, I was able to find 2 methods that gave me a configurable routing (and if I drill into it further, the components seems to be configurable as well).  So, start with your standard VC tasks.  Create the characteristics and the class to hold all your attributes. Next, you need to create yourself a Super General Task List.  Go to transaction IA05.

blog2-02

Just go ahead and copy or create a new task list.

blog2-03


Enter in all the possible operations that can be chosen for this service product.

blog2-04

For each operation, enter in an object dependency, a selection condition to be exact.

blog2-05

Here is a sample global dependency (by the way, I always recommend global over local dependencies).

blog2-06

As you can see, the code is simple.  Just a characteristic and a value.  Repeat this for all the operations that are dependent on certain characteristics.  Once you’ve enter in all the dependencies, save and move onto the next step.

Now things change a bit when you move to the configuration profile.  I’m an old school VC guy, so I’ve always used material.  I’ve almost always looked right past the following selection.

blog2-01

So, if you select the General maintenance task list, instead of a material, you will need enter in the task list.  Once inside, the configuration profile is like any other profile.  You must assign a class (type 300).  You can get fancier here by adding procedures or constraints.  But for our example, I’ll keep it simple.

Now, to keep things easier to deal with, go to transaction OISD, to select the general task list.

blog2-07

My example uses the standard Return and Repair process.  So after receiving the equipment, I use the repair sales order to generate the service order.  Now, the drawback to this approach is that you must enter in the configuration during the first visit into the service order.

Up to now, I’ve been unable to make the routing recognize the configuration as a configurable service product.  Only if it is directly linked to the task list.

Now, reading the documentation…  it’s a little vague…

Use Features
PM, maintenance order Assign an object dependency and a configuration profile to the general maintenance task list.
CS, service order with configurable service product A configuration profile is assigned to the configurable service product. From this, assign object dependencies but no separate configuration profile to the general maintenance task list. If, however, you still choose to assign object dependencies, they will be ignored by the system.
CS, service order with “normal” service product Assign an object dependency and a configuration profile to the general maintenance task list.
PM and CS Assign an object dependency and a configuration profile to the general maintenance task list.

If you assign the general maintenance task list in the Customer Service component to a service order with a configurable service product, the configuration of the service product has priority over the configuration of the general maintenance task list.

I’ll continue experimenting, and if I can make it work, I’ll do a future post.

As always, thanks for reading,

Variant Configuration – Class Type 200 vs. Phantom KMATs

Recently, I was reminded of one of the biggest downfalls of using class type 200 within a VC BOM.  The is the inability to track the changes using ECM.  This got me to thinking about the differences between the approaches of Class Type 200 vs. Phantom KMATs.  While both methods cwill ultimately get you to the same place, there are very obvious differences between the 2 methods.  In general, both approaches are very valuable, but each has pros and cons.  So let’s talk a little about the differences…

Let me define what I mean by a phantom KMAT.  This is simply another KMAT that sits on the top level BOM.  So this turns into nested KMAT’s, but often there is no configuration that occurs on the phantom level.  It is more of a BOM grouping, with pass through values (if could be configured, but for our purposes today, consider it just a group of parts).  You simply create a KMAT, say Hard Drive, that contains all of the possible hard drives you wish to use.  Then you add the selection condition to each component, set the Material master of the HARD DRIVE KMAT to be a phantom and you’re ready to go.

The first major difference is the change management aspects.  Because of the way the class type 200 works, you can’t add or change materials using Engineering Change Management.  For many organizations, this can be a show stopper.  The convenience of not creating selection conditions for each material, but simply adding characteristic values can be tempting…  but if your organization needs to do a lot of obsolete and supersceding of components, class type 200’s can be a major obstacle.  Now the Phantom KMAT will not have this issue.  But, the price is creating a selection condition for each material on the BOM, and also using a constraint to pass the values from the parent to the child KMAT.  You may also need to create a class for each Phantom KMAT that only holds the characteristics needed for those components, or you could reuse the entire class.  Either way, it can be more overhead.

Reuse of the items.  This is the place that both methods work great at.  Now, one of my favorite things to do is create generic KMAT’s that can be used across multiple product lines.  In my first VC job, we did a lot cables with 35 or more different connectors that can be used.  Well, since the same components were often used across multiple product lines, I could create a single phantom KMAT and use it on multiple top level KMAT’s.  the Obvious value is maintaining changes in one spot.  the hardest part of this method is thinking far enough ahead to make it useful.  Now you can do the same thing with class type 200’s as well.  So both methods are great for this.

A single component vs. as many as you need.  Now another obvious drawback to class type 200’s is the limitation of only being able to select a single part number.  If you had multiple part numbers, you would need multiple classes to select all the components.  Within a phantom KMAT, depending on your selection conditions, you could select as many as you need.

So far, everything seems in favor of the phantom KMAT, but here’s one that is big benefit to the class type 200.  If you work in an environment where parts change often, new options are constantly added, or perhaps you engineer as you need something…  well, the class type 200 can be set to required.  this means that your sales order will show as incomplete if the class doesn’t find a material.  Phantom KMAT’s don’t have an easy way to accomplish the same thing.

Now there are other pro’s and con’s, but in my experience, these are the 4 biggest features to keep in mind.  I’d love to hear your comments.  Thanks for reading,

Variant Configuration – Balancing Options vs. Maintenance

Today, I’m going to talk a little bit about the “theory” of variant configuration.  I use the term loosely, because, well, everyone has their own theory.  I guess that’s why it isn’t a law 🙂  One of the struggles I encounter over and over again is clients that want to use the variant configurator to handle 100% of the options for a product.  Without a doubt, the first place I learned VC was still one of the most solid implementations I’ve ever seen.  But ever there, the line would occasionally get blurred.

Let me walk you through what I mean.  Whenever I walk into a VC project, I go in with the expectation of being able to handle 80% of the product options.  Some places more, some less, but it all depends on the complexity.  For example, let’s just say you have an option that is order twice a year, but it works like everything else.  It’s just a simple option, no complex logic, so in my mind, it’s a no brainer, add it and probably never sell it, but life isn’t any harder from a maintenance perspective.

Now, we take the flip side.  We have an option that gets order let’s just say 12 times a year.  But this option has a lot of extra rules built around when it can be picked, what it can be used with, complicated BOM components dependent on multiple things.  Well, now what do you say?  if it’s me, I try to push back saying it should be a special.  What’s a special Mike???  Well, very simple.  It’s a standard part number in the system, you can even copy the BOM rules from VC to get everything else right.  But you keep that stuff out of the VC.  “But why?  VC can handle it?”

While that statement is technically true, VC can handle most anything.  What becomes the defining factor is the increased logic that all the simple things now have to work around, along with the time to “decipher” what is happening every time a new option gets added, or something simple changes.  That costs time, money, and even processing speed.  For a “possible” 12 orders, that just as easily could have become standard part numbers.

Now everyone will take their own stance on this, and everyone is probably right…  for their scenario.  I’m just telling you from my standpoint, specials should be special…  standards should be VC 🙂

Thanks for reading,

Variant Configuration – Using the SCE Debug

Well, a while back, I did some posts about different ways to debug in the IPC.  THere was one more way that I never talked about, mostly because I hadn’t been able to get it working on my machine.  Using the SCE Debug as a tool is a great way to test your models on a local machine.  While it won’t contain all the same information as doing it online, it does give you the opportunity to play with your model without being connected to SAP or even the internet.

The modeling happens in R/3 as usual. If something is to be tested in IPC, a runtime version has to be created. This is of course the same pre-requisite for the IPC running in VMC of ECC. However instead of calling the report to publish the runtime version to VMC’s DB, you download it, using transaction CU36. It will download the whole KB into flat files. The flatfiles will then be imported into a (local) database. This process is executed by a simple batch file. After the flatfiles are imported, the RTV is available to SCE.  For more information on this, see my previous posts.

Select from the menu Trace–>Trace Settings.

blog01-01

In the dialog you can select an appropriate input level for filtering out some details (if wanted). 9 will show everything, which makes sense for a trace.

Select from the list of modules, for what you want to receive log entries. They are as follows:

Module Description
DDB Dynamic Database. This is the memory of the inferencing engine, storing all facts about the current configuration state.
PMS Pattern Matching System. Constraints are considered declarative. This means in opposite to procedural coding where everything is executed line by line, constraints describe a status and will be executed in any undefined order if their pattern is fulfilled. The pattern usually exists of an object declaration as well as a condition. The pattern matching system is responsible to find those constraints, which patterns are fulfilled.
CSTR Constraint. This is useful for figuring out for example in combination with DDB, how a constraint influences facts.
RULE Rules. (If used) Mainly used in Advanced mode as monitoring rules
CFG Configuration
SCND Selection condition (good for troubleshooting existence or missing items on a bom explosion). See super bom.
PCND Precondition. If used. It is strongly recommended not to use any preconditions.
PROC Procedures. This option makes most sense in combination with DDB, seeing which modifications happen.
FUNC Functions
TABL Variant Table access

Table 1 “traceable engine modules”

Very typical and useful settings are DDB,CSTR,PROC. Eventually SCND if the bom explosion is to be verified.

After selecting the options, you can do any modification directly in the SCE UI. With each selection / modification, you see traces being updated in the lower part of the window:

blog01-02

The trace area is not very powerful regarding functionality like search etc. The right click menu allows to clear or to save it to a file. It is however possible to select all entries with ctrl + A, copy the traces (ctrl + C) and paste them into an external editor, such as notepad++.

One of the biggest benefits of using the SCE over using IPC is if you want to see the initial logic being executed, you activate the trace and create a new configuration session (with the white paper icon in sce).  The IPC will automatically execute the initial logging before you can begin the simple trace, so often this will help you find problems within the initial execution of your dependencies.

As always, Thanks for reading,

Variant Configuration – SCE UI Load KB

Well, since I’m on a roll, figured I might as well show you how to load the KB into the SCE UI within your local database.

The first step is to make sure that you extracted the latest files from CU36 (see my previous post for details on this).

Now, here is where you need to do a little work.  In your IPC installation directory (and I use the word installation loosely, since it was just a zip file with a bunch of files).  So, what needs to happen is to copy all the flat files into the ..\db directory (for me, there was an intermediate folder, so for me it ..\db\temp\ to hold all my flat files.

Now, one additional step that I needed to do was copy the file sce_import_meta_data.sql from the ..\lib\scripts\ directory and place it in the ..\db\ directory (notice that even for me, it was not in the temp directory).  Now, I also needed to rename this file to be: import_meta_data.sql

Once this prep work has been completed, go the ..\bin\KBAdmin.bat

blog03-01

Verify your DB settings (see my previous post on the SCE if you need more details on how to set this).

blog03-02

Use the menu:  knowledgebase–>upload

blog03-03

enter in the location you used for the flatfiles (see above for more details).

Press Start Upload.

When it’s done, you will now have the DB populated with the knowledge base you loaded.

When you know what to do, it’s pretty easy…  but this took me a few hours of experimenting to figure out what to do… =)

Thanks for reading,