Warranty Claims

Home / SAP / SM / Archive by category "Warranty Claims"

Adding Additional Document Flow to a Warranty Claims

Well, since my bread and butter is SAP, I have found some new tricks since I was last blogging, so might as well sprinkle those in along with all my new endeavors.  ha ha ha.
I guess this blog post could also have been called implementing a Badi…  but that doesn’t so as much fun 🙂  My goal was to add some additional links into the Warranty Claims document flow.  Namely, I wanted to see purchase orders that might be generated during the flow of the claim.  Out of the box, these are not part of document flow, so I began searching on how to do it.

Everything started with using this blog post to get me started on how to do the Badi.  But of course, the real work came from figuring out how to get it all connected.  So first let me tell you some of the basic data you will need to make this work:

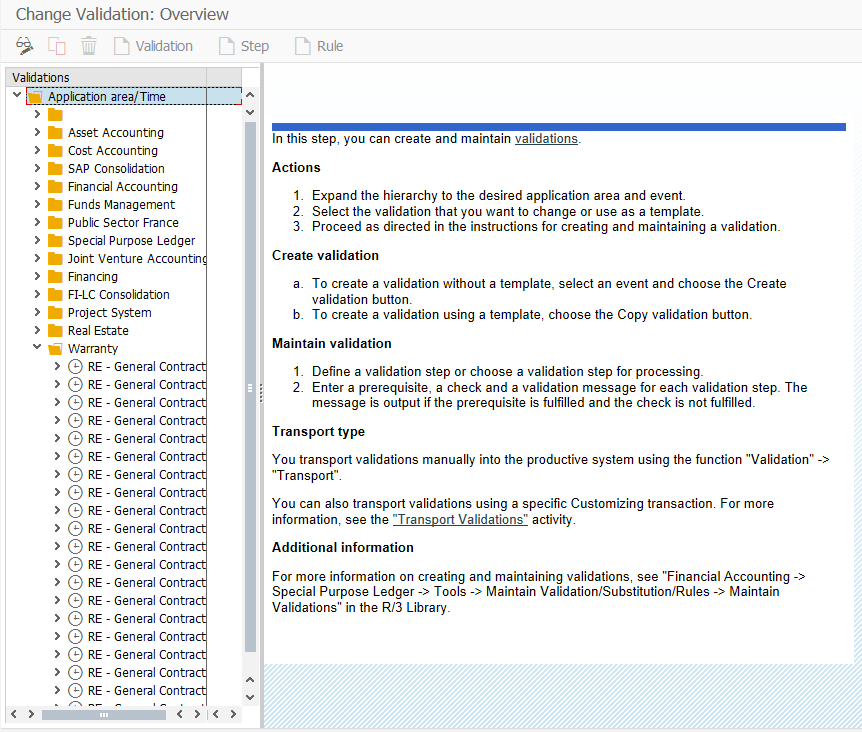
BAdi Definition:  WTY_DOCU_FLOW
Interface:  IF_EX_WTY_DOCU_FLOW

I needed to update 2 methods in order to make it all work.

  • ADD_DOCUMENT – this adds the link into document flow
    •   DATA:

          lt_gbinrel   TYPE TABLE OF gbinrel,

          gs_wdocs        TYPE pwty_wdocs,

          lt_trl_borid TYPE          trl_borid,

          ls_trl_borid TYPE          borident.

      **** via document relation

        CALL FUNCTION ‘WTY03_RELATION_FIND’

          EXPORTING

            iv_claim   IV_CLMNO

          TABLES

            et_gbinrel lt_gbinrel

            et_object  lt_trl_borid.

        LOOP AT lt_trl_borid INTO ls_trl_borid.

            CASE ls_trl_boridobjtype.

              WHEN ‘BUS2012’.

                gs_wdocsdoctype  ‘EBELN’.

                gs_wdocsdocttext ‘Purchase Order’.

                gs_wdocsclmno    IV_CLMNO.

                gs_wdocsdocno    ls_trl_boridobjkey.

                APPEND gs_wdocs TO ct_wdocs.

            ENDCASE.

        ENDLOOP.

  • DOCUMENT_DISPLAY – I enhanced this so that you could double click on the node in document and drill to the PO
    • Data:  ld_ebeln type eblen.
    • case is_wdocs-doctype.
      • when ‘EBELN’.
        • ld_ebeln = IS_WDOCS-docno.
        • set parameter ID ‘BES’ FIELD ld_ebeln.
        • call transaction ‘ME23N’ and skip first screen
    • endcase.

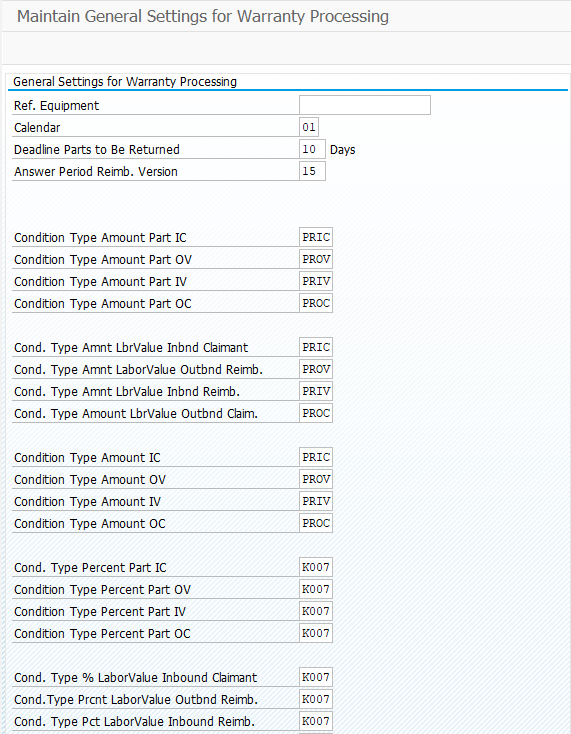
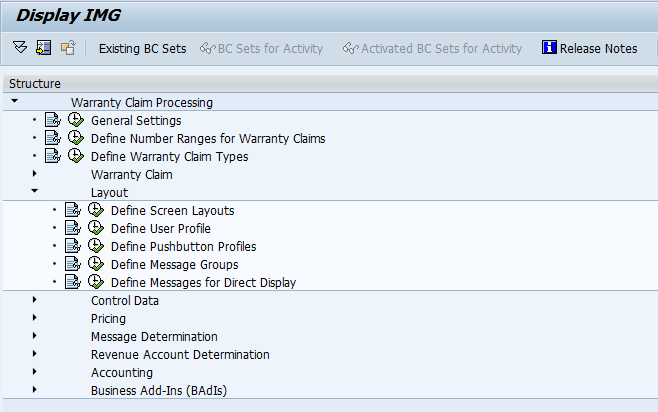
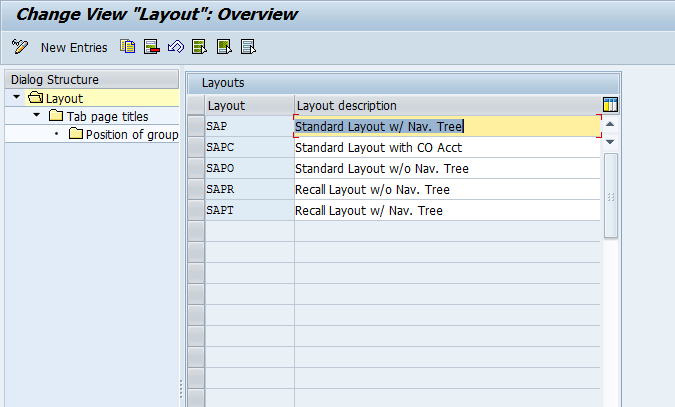
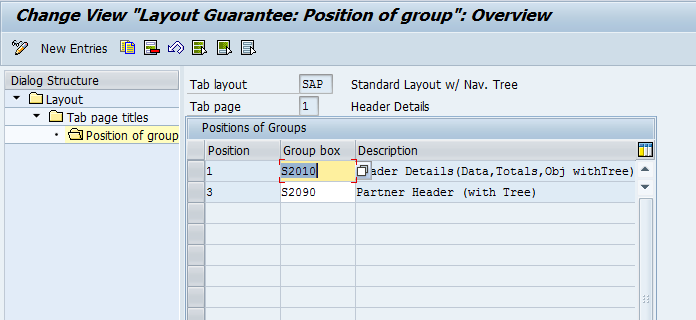
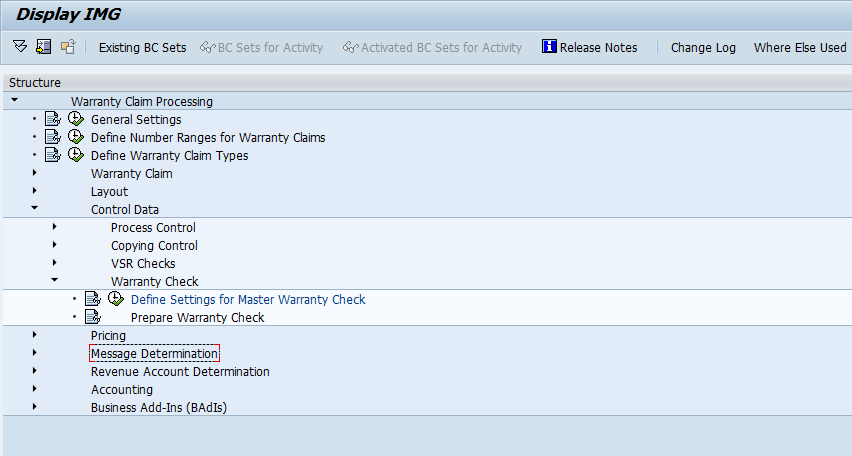
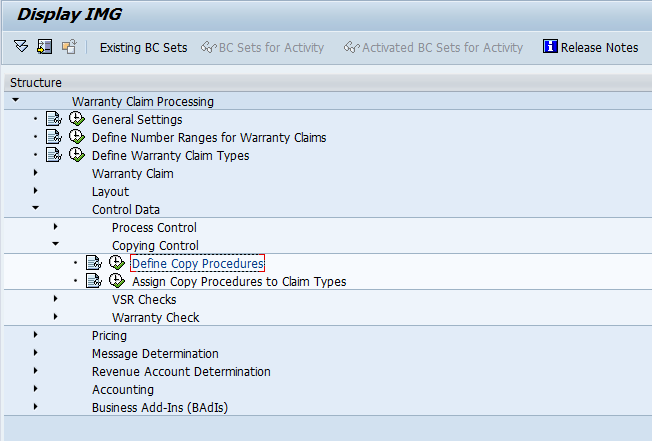
Now, of course there isn’t Purchase order action out of the box either…  so I had to build that as well.  to do that, I had to define an action (see TXN:  OWTY –> Control Data –> Process Control –> Define Actions)

I created a new one, and then assigned a function module to it that called a BAPI to create the PO (and of course it pulled data from the claim to have it all happen in the background).  If you would like more details on creating this function, let me know and I can walk you through that in a future post.  The key piece of this is to create the document flow links using the function ‘BINARY_RELATION_CREATE’.  this links the PO and claim.

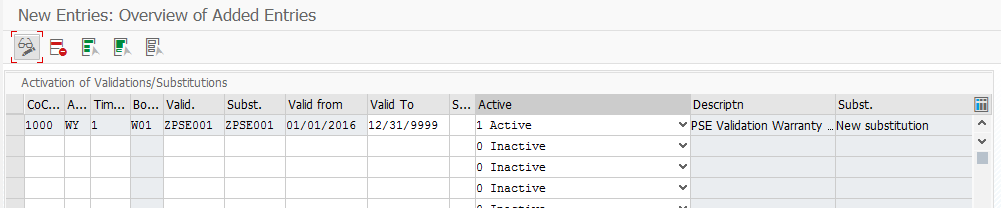
Once you have the new action, you need to build it into the Action controls and of course, play with a bit to make sure 1) you are creating the PO, 2) you are linked to it and 3) that your BAdi above is firing to add the document flow.

All and all, it was a lot more moving pieces than I expected, but it was a fun exercise (once it was done.  LOL).

Ping me if you have issues, and as always, thanks for reading,

Service management – Warranty Claims – General Settings in OWTY is Blank

I recently ran into a strange issue.  I was configuring warranty claims, but the general settings screen is completely blank and there are no options to add a new entry.

So, the first thing that needs to happen is that you need to generate a blank line in order to populate the entry:

See OSS Note: 1039665 – this will give you a simple way to add the entry.

Next, you will probably want to see the baseline configuration:

Hope this helps,

Thanks for reading,

New book – Warranty Claims

I’m really excited.  I just finished my latest book, and this one talks about warranty claims.  I’ve had this book sitting in the back of my brain for a couple years now.  Even after all this time, I was looking for good books or resources to understand warranty claims, and I couldn’t find anything.  So I spent some time and finally put together a comprehensive e-book that talk about what warranty claims are, how to configure them and even some end to end examples.

SAP Service Management – Warranty Claims

If this is a subject that interests you, I encourage you to check it out.  Currently, the book is still waiting for the cover and approval into the “premium catalog”, but I was just so excited to have this finished, that I really wanted to toot my own horn a bit.

Thanks for reading,

Warranty Claims – Creating a Notification directly from a Claim

Well, since I began my adventure into claims again, I’ve been struggling with it allowing me to create a notification, or even edit it directly within the warranty claim.  I know I had done it in the past, but couldn’t get past several silly error messages.

The first error message I received was:

Action Control

Error within action control (Customizing, data)

Well, needless to say, there is no documentation out there for this error.  After a lot of trial and error, I finally found the issue.  If you go into  OWTY -> Control Data -> Process Control -> Define Actions

Action T205 (and T206) need to have a function assigned.  I set up the following:

T205 – WTY04_NOTIFICATION_CREATE

T206 – WTY04_NOTIFICATION_CHANGE

Within in my procedure, I already had entries for T* as valid options, so I didn’t need to do any additional work there.  If you copy from the standard options, you will likely have these entries as well.  This got me closer, but I still had issue.  I ran into message:  WTY 119.

QM/CS/PM Message
Only message types with previous number assignment-Customizing mess.type

After scratching my head a bit, I experimented with different notification types.  Turns out, the notification must assign numbers in advance in order to be used within a claim.  My custom notification type had this turned off.  I selected the standard S1 notification type, and voila…  it works.  Now, I need to do more experimenting to get my credit memo request working, but at least I know where to start.

Thanks for reading,


Warranty Claims – Activating a validation or substitution (VSR)

I had to spend some time to figure out this portion actually worked.  I figured out how to make a validation, but no matter what I did, I couldn’t get it to execute.  Well, turns out, you need to go to an additional transaction to turn this stuff on.

WTY_VSR_ACTIVE – Activate validation and substitutions

Once you know it, it’s pretty straightforward.

blog-vsr-001

Company Code: enter in the company code this should be activated in.  Note, you will need an entry for each company code.

Area: WY

Timepoint:  this will be particular area within the validation and substitutions areas.  1 – 21.

Bool Class:  this will be determined by entering in the Area and Timepoint.

Validation: enter in the validation name.

Valid From: valid from date

Valid to: valid to date

Sequence: sequence of the rules

Active: active or inactive.

it’s really that simple.

thanks for reading,

Warranty Claims – Creating a Validation

This is something within claims that I’ve always wanted to figure out, but until recently, I just didn’t spend the time to do it.  turns out, it’s a very cool feature.  The idea behind a validation is that you can create your own custom rules without any development.  The rules will then check fields based on your requirements.  If they are blank, or incorrect, you can flag a message to correct the field.

Here are the basics of creating a validation.

using transaction OWTY, go to the following portion of configuration:

Warranty Claim Processing -> Control Data -> VSR Checks -> Specify Validations

Once you enter the transaction, you will need to drill down to the warranty section.  You will notice there are 21 different branches under warranty.  Although they are not labeled, these correspond to the boolean classes.

blog-vsr-01

Highlight the folder you wish to add a rule to and press the Validation Button

blog-vsr-02

Enter in the following information:

Validation Name: the key for the validation.

Description:  description of the validation

Message ID: the message class that will be used.  By default, WTY_VS.  However, you can assign your own message class to get the errors you want.

Authorization: The authorization group allows extended authorization protection for particular objects. The authorization groups are freely definable. The authorization groups usually occur in authorization objects together with an activity.

After populating this information,  press the create step  button .

blog-vsr-03

Now we get to the real work.  Within the step, there are 3 pieces.

Prerequisite: here you enter in the conditions that must be met.

Check: this is the actual validation that is occurring.

Message:  this is the message that is displayed if the VSR check is false.

The best way to understand this is with a demonstration.  So I will show you a simple validation that checks if the reference date has been populated, but only when the claim type is Z005.

Select the prerequisite from the menu.

blog-vsr-03

First, from the list of structures, select the second table:  WTY_RULE_H and double click to bring up the field list.  Scroll down to WTY_RULE_H-CLMTY and double click.  The table and field name will now be shown in the top window.

blog-vsr-05

Next, from the Status section, double click =.

blog-vsr-06

Next, press the Constant button.

blog-vsr-07

Select or type Z005 and press enter.  Now you will see the completed the formula.

blog-vsr-08

Next, select the check.

Repeat the steps above to build the formula:  WTY_RULE_H-REFDT > ’01/01/1900′

Note:  I had trouble making WTY_RULE_H-REFDT <> ” work properly, so I adapted the formula.

Finally, press the message.

blog-vsr-09

Description:  Enter in a description.

Message type: E or W or I

Message number: Do the pull down here to see the messages available.

Message variables: If the message has variables, enter them bottom section.

Save the validation.

Use Transaction: WTY_VSR_ACTIVE to activate the VSR checks. I’ll talk more about this in a future post.

Thanks for reading,

Warranty Claims – Dealing with a Vendor Warranty

Thanks to all of you that have commenting on some of posts.  I recently got a comment that I figured would be better to do a post on, rather than just answer the question.  It’s interesting, because the question that came up seems like it would be pretty standard, yet I haven’t run into the actual scenario before.  The scenario is that I have a part with a vendor warranty.  The part comes back to me, I fix it and return it to the customer.   then I need to invoice the vendor for my repair since it was under their warranty.

Initially, when I looked at this scenario, I thought I could avoid the warranty claims altogether.  I was hoping for a simple credit memo generated from the repair line.  But you can’t change the partners here since it’s a sub-line item.  If it were me, I would want to maintain the history, so keeping my document flow together is ideal, maybe even critical depending on the business needs.  This leaves me with 2 options.

The first option is what I’ll call the quick and dirty method.  This process will have gaps that might cause headaches, but it depends on how often this occurs, and of course the terms of the warranty.  This process would be to create a credit memo request with reference to repair sales order.  Now, in the copy control, you’ll first need to allow this.  You may even consider generating a new document type specifically for vendor reimbursement.  Now, the gotcha’s begin to happen when you need to work with a  vendor, that may or may not have a corresponding customer master to assign to the document.  If you’re lucky, there is a customer master, and then this process will work for the easy stuff.  Now, the issues will arise when your credit memo to the vendor doesn’t match what they will reimburse.  Say for example, they only reimburse parts, but not labor.  If you invoice for the full amount, they may reject parts, forcing you to cancel documents, or make changes and then reissue the document, just to get paid.  In addition, you will want to make sure you assign the technical object to the credit memo request to make sure the serial number history is maintained.  As you can see, there quite a few places for this process to go wrong.  However, in a small shop where this doesn’t happen often, this may be a viable solution.

The alternative solution I’d implement is using Warranty Claims.  Now, the problem with claims is that they can be complicated and master data intensive.  But it will give you the greatest amount of flexibility and reporting.  (keep in mind, I haven’t configured this, so I apologize if miss something).  I would implement a post-crediting scenario.  I would send the reimburse the details of labor/materials/etc. along with the total amount I want to reimbursed.  Now, you won’t need to worry about interacting with the customer who owns the product.  They will deal with you through the standard return and repair scenario in SAP (since you probably already have a notification, be sure to attach it to the initial claim to be sure you maintain traceability).  If you look at my original post on warranty claims for beginners, this scenario will only need to be configured with version 2 & 3 shown in that post.  So when you configure the scenario, you don’t need to worry about the version 1 & 4, since you don’t need to deal with the customer, this is purely a reimbursement from the vendor to you.  You could go the full way, but I don’t believe it’s needed to accomplish everything needed for this scenario.

Some things to remember, each vendor must be assigned a customer master (just the way this works).  And those customers must be assigned the AS partner type to make them eligible for claims processing.  You won’t be able to avoid this master data setup.

I’ll be sure to prototype this before I finish writing my book on Warranty Claims 🙂

Thanks for reading,

Warranty Claims – Layout – Define Screen Layouts

Well, I thought I might as well do posts on the Warranty Claims.  I wanted to start talking about the Layout section of configuration.  If you are familiar with the notification or equipment records, you should be very familiar with this concept.  You have a lot of building blocks, and endless possibilities of what to show, what sequence and what tab.  Let me show you just how flexible it can be.  The Define Screen Layouts is ever more flexible, in my opinion, than the equipment record or notification.  You have unlimited items you can load onto a tab, not just the standard 4 or 5 fixed locations.

blog5-01

Using OWTY, you can see the layout folder.  Define Screen Layouts is our destination today.

blog5-02

So, you will now notice the familiar tree structure on the left.  If you are designing your own layout, I highly encourage you to copy one of the existing layouts and change it to fit your needs.  For demonstration purposes, I’ll walk you through the SAP layout.  Highligh SAP, then double click on the Tab Page Title on the left.

blog5-03

Now on this portion, you can see each tab that is configured for the layout.  Again, you can define as few or as many tabs to be displayed for your layout.  You can also adjust the titles of each tab.  For demonstration, I’ll select the Header Details tab, to show you the next drill down.

blog5-04

Now, for those of you familiar with the equipment configuration, this will be somewhat familiar.  The nice thing to notice is that you are not confined to the 4 or 5 fields.  You can add as few or as many boxes as you want.  The Group Box contains sets of fields that you can add.  Unfortunately, you cannot alter the fields within a group box, but at least you can limit what you show.  As an example, check out some of the many group boxes available for the warranty claim layout.

blog5-05

This is the part that typically requires a lot of experimenting.  Many of the options look similar, but will have quite a different look and feel.  So I encourage you test each one to make sure the optimal selection is made.

You’ll just continue this process for each tab, until you have your claim layout.  Remember, if you create a new layout, you will need to go back to your claim configuration and enter this new layout.

thanks for reading,


Warranty Claims – Control Data – Warranty Check

Well, I recently talked with some old colleagues about an upcoming new avenue of business for them.  One of the options was Warranty claims, so that got me thinking that I should get back to this configuration piece of warranty claims 🙂  Today I’ll discuss the Warranty Check.  The configuration itself is pretty straightforward.  The idea behind this single piece of configuration is how the action (A200 Warranty Check) should behave.

blog4-01

Using OWTY you can see where to configure this step.

blog4-02

Now the configuration portion only has 2 pieces.  One is the LinkItemResults which can be either AND or OR.

This field comes into play if you have a complex master warranty that contains more than 1 item.  So if you have a simple time based, this won’t impact you at all.  But if your master warranty has multiple items within it, and you select AND, then all items must be true for it to be considered under warranty.  If you select OR, any one item will suffice to be considered under warranty.

The FactoryCalender is exactly what it sounds likes.  Just another calender, that will be used to calculate time based warranties.

I’ll try to post more warranty claims config in the coming days, as I don’t have anything else interesting to post at the moment.  I’m currently trying to catch up on my sleep after 3 incredibly long weeks.

Thanks for reading, and as always, if you want to hear about something in particular, let me know.

Warranty Claims – Copy Control – Assign Copy Procedures to Claim Type

Figured I better finish off these section of configuration before I get sidetracked again J  So today we’re still talking about Warranty Claims, Copying control.  Today we will go over the Assign Copy Procedures to Claim Types.

blog02-01

Again, go to OWTY to find this configuration, and you’ll see where to get to this menu.

blog04-02

Beyond this, it’s pretty straightforward.  For each claim type and vervion type, you can select the copy procedure you want to use.  In addition, there are a few extra check marks:

COpyPriceMAT
CopyPriceFR
CopyPriceSUBL

You can control copying prices separately for the item types MAT, FR and SUBL.  We will talk more about these in a future post when we start talking about items.  For now, just know that you can control what prices should be copied.

That’s it, nice and easy.
Thanks for reading,