Now that I’ve given you a taste of configuring warranty claims, I thought it might help to start with an example. I’m going to walk through a Post Crediting example. So today I’m going to talk about the first step in the post crediting processing, the Warranty Claims IC or inbound from the the claimant.
Now, everything starts with transaction WTY, so we head over there to create our sample claim.
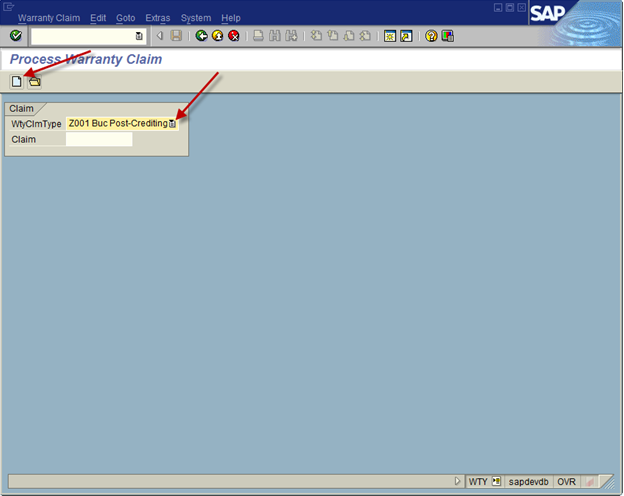
Set the Claim Type: Z001
Press Create
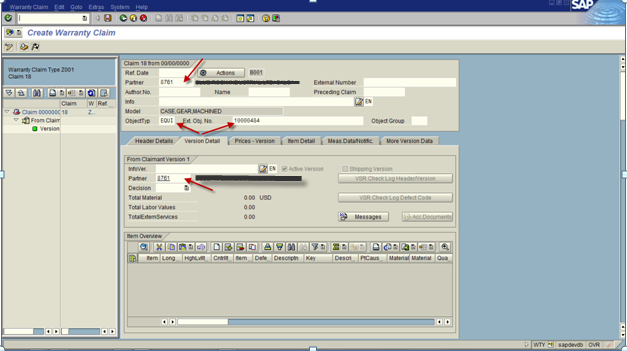
Now, everything is configurable, so these screen shots show exactly one possible setup. So the information I suggest entering is one possible set of data that can be collected. In this claim, it is based on an equipment record. This example is a claim from a customer, and will be serviced by a vendor.
Header Information:
Enter in the Partner (claimant customer)
Object Type: EQUI (this is the header equipment)
Ext Obj. No: Equipment Number
Version Detail Tab
Partner: (Claimant Customer Number)
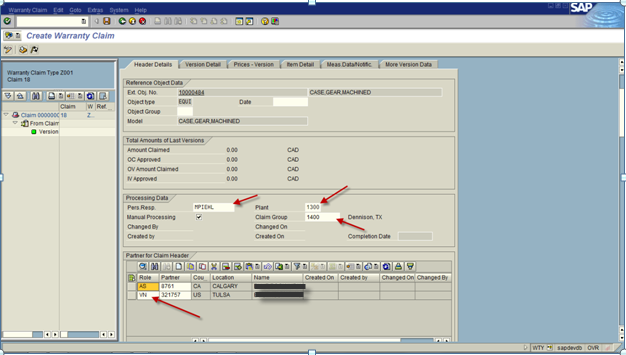
Header Detail Tab:
Person Resp: optional
Plant: will come in automatically
Claim Group (should be whomever will be the reimburser)
Partner Table Control: Add an entry for the Vendor (VN and vendor number)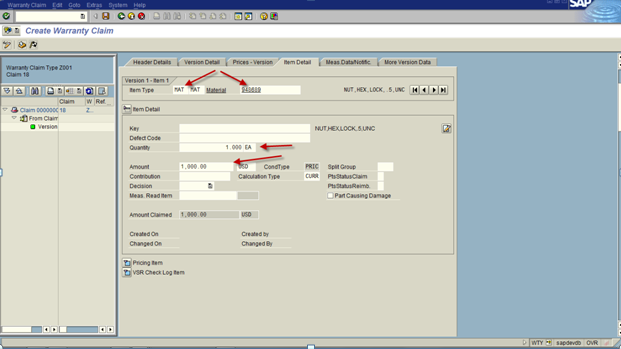
Item Detail Tab – this is the area where you enter in the material to repair or return:
Item Type: MAT
Material: The material that is being repaired/returned
Quantity: 1.000
Amount: this is the proposed amount of the claim.
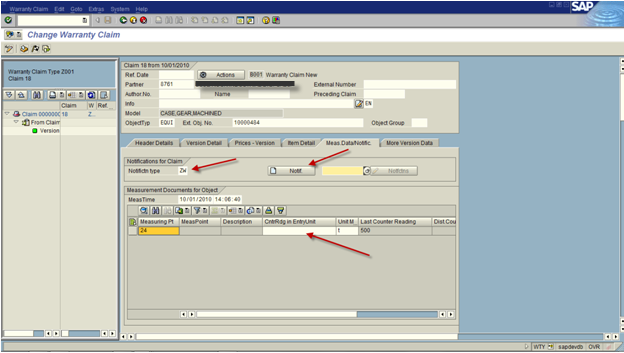
This next section gives you the opportunity to create a service notification connected to the claim. This is especially valuable if you use the return and repair process.
Notification Type: ZW
Create Notification Button (this will replace IW51 or you can enter in an existing notification number) If the header level equipment has a measuring point, you can enter in the measuring document.
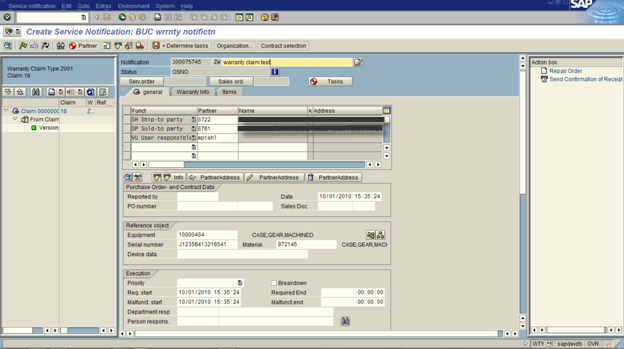
Enter in the remaining information, and green arrow back. (don’t create the repair sales order. this is will be a separate step).
Next up, we get to revisit the VERSION DETAIL.
VERSION DETAIL Tab.
For each item that is under warranty: enter in the vendor number.
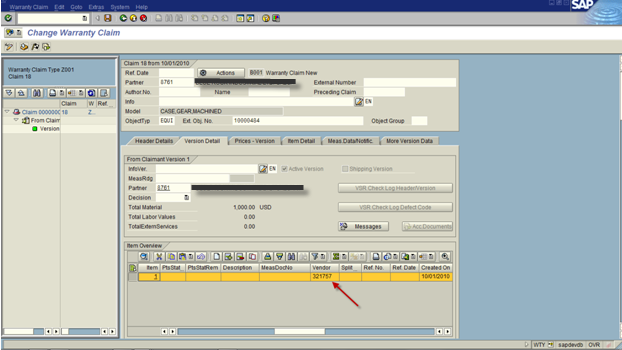
Save after entering in all of this information.
Now the notification can be processed as it normally it would. After the part has been received and analyzed, you can continue processing the claim.
Update the amount to be claimed for the item (item detail tab).
Currently the Claim will be at Status B002: claim being processed
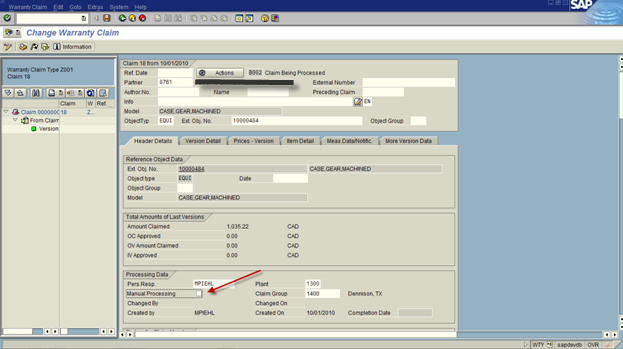
Now, when you are ready to move to the next step of the claim, you need to move to the next status.
Uncheck the manual Processing check box.
Press the Actions button:
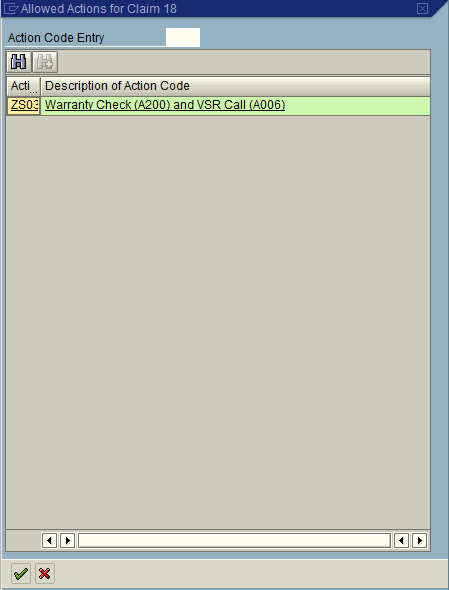
Select ZS03 and hit the green check.
If the top level equipment has a master warranty associated with it, then this screen will appear showing if the part is still under warranty/contract or not.
The notification will now be at B003: Claim Checked.
This bumps the status and allows you to create the next version of the claim, but we will save that for another post.
Thanks for reading,
Uncheck the manual Processing check box.
Press the Actions button: