A new trick that recently discovered, is that you can actually add your folders and nodes to SPRO. While, to most people, this isn’t all that interesting, when you design software in SAP, what could make you look more professional than to have your section in configuration.
Like always, my blog is also my notebook, so if this isn’t for you, have no fear, I’ll get to something more relevant in the next couple of days =)
Txn: S_IMG_EXTENSION
Now, do a pull down on IMG Structure, and select the node that you want to add a folder underneath. In my example, I’m going to add it to the top level. And then you also need to select the Enhancement ID.
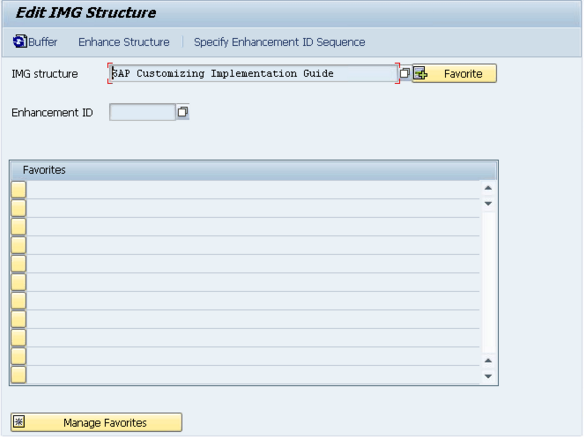
Pull down on Enhancement ID.
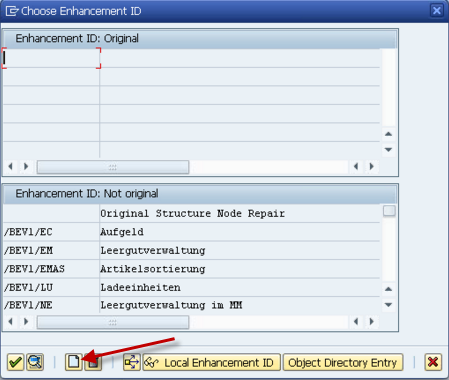
Press Create
Enter in the namespace + description, and save it in a transport request (at least if you want to transport it anywhere).
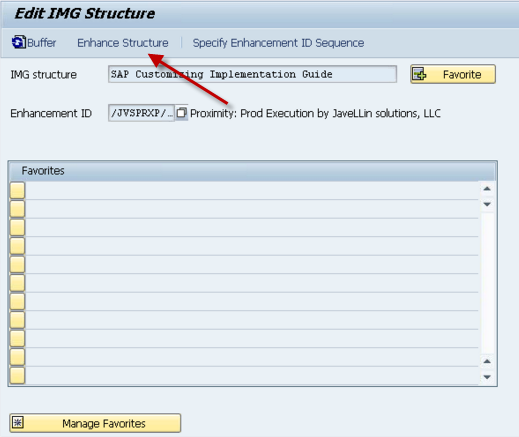
Press Enhance Structure Button
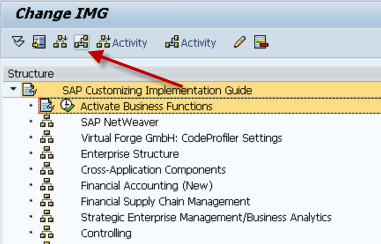
This will bring up the IMG screen. Simply select the node that you would to insert your folder after. Then press the button Shown above.
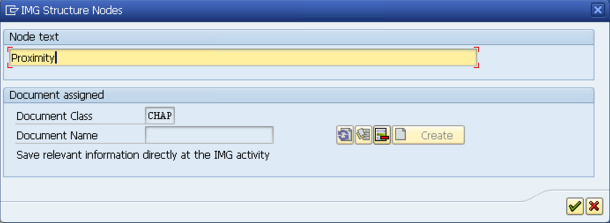
Give the folder a description

Next, you need to insert an activity. In my example, I used 2 subfolders, and a transaction at the 3rd level. Feel free to structure it anyway you like =)
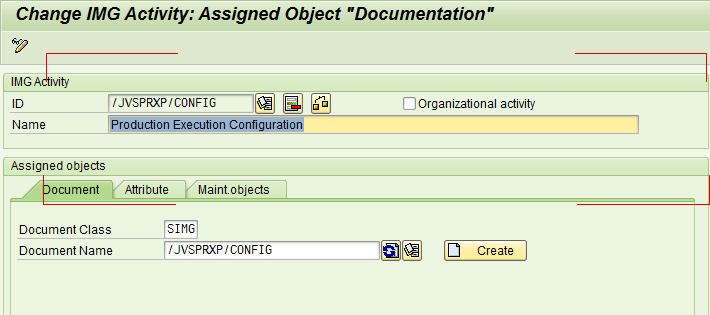
First, create the activity. Give it an ID, and then a description.
Next up, create a document for the ID. This will be the documentation that shows up alongside the activity node.
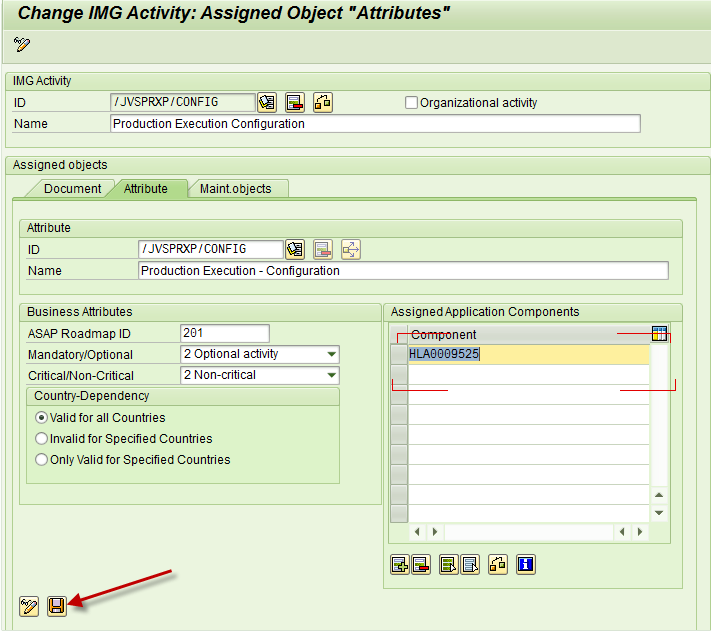
Next up, fill in the fields shown above, including the application component. Take your best guess, or give it several options if it spans multiple areas. Then save it on the button of the screen.
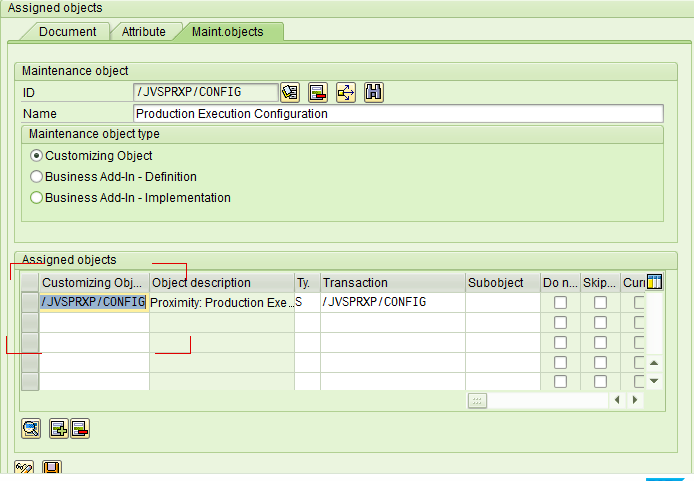
Finally go to the maintenance object tab. This is where you assign the transaction to call. One of the things to keep in mind, is that you must specifiy a table, and it must have a maintenance view generated for it (SM30). Put the table into the customizing Object, give it a TYpe: S, and then enter in your transaction.
Save it on the bottom, save it on top.
Green arrow Back
Save once more. You now have your IMG folder/transaction =)
Thanks for reading,
Mike
As always, thanks for reading and don't forget to check out our SAP Service Management Products at my other company JaveLLin Solutions,Mike

One thought on “Configuration – Customizing SPRO to Add folders and nodes”