
On to step 5.
Step 5. Create a Workflow Task [Heading 2]
Because this is a simple workflow, you don’t need a whole workflow template. You just need the single task. Your event is the change in status that triggers the workflow task. That in turn triggers the method to make the change.
To create your task, execute transaction code PFTC_INS. In the screen that appears, select TS Standard task and click the create icon (Figure 18).
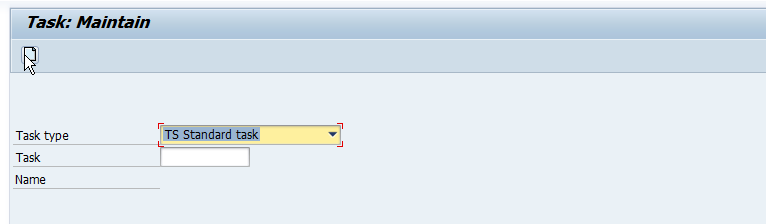
Figure 18 Create a task type
The basic data for the workflow is prepopulated. The work item text can be determined by clicking the insert variables icon ![]() shown in Figure 20 and selecting the appropriate objects. This puts the text into the workflow task that is created for the event. This text allows you to see at a glance which orders have been executed within the workflow list. Figure 19 shows some of the fields that can be used to determine the text.
shown in Figure 20 and selecting the appropriate objects. This puts the text into the workflow task that is created for the event. This text allows you to see at a glance which orders have been executed within the workflow list. Figure 19 shows some of the fields that can be used to determine the text.
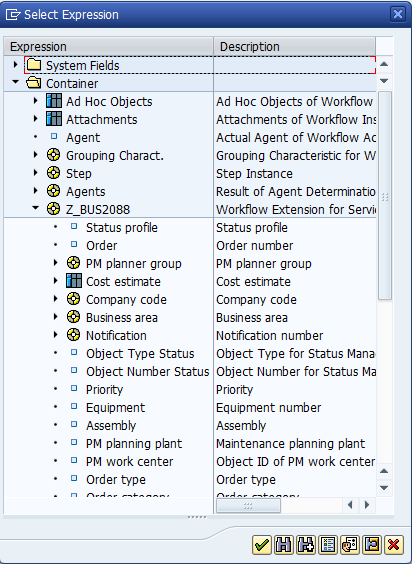
Figure 19 A sample of available variables to use in the text
You have many options to choose from to create any description that provides a unique text string to identify a particular workflow at a glance. Simply double click or highlight your selection and press the green checkmark. In Figure 20, the Number (order number) and the Order type are shown.
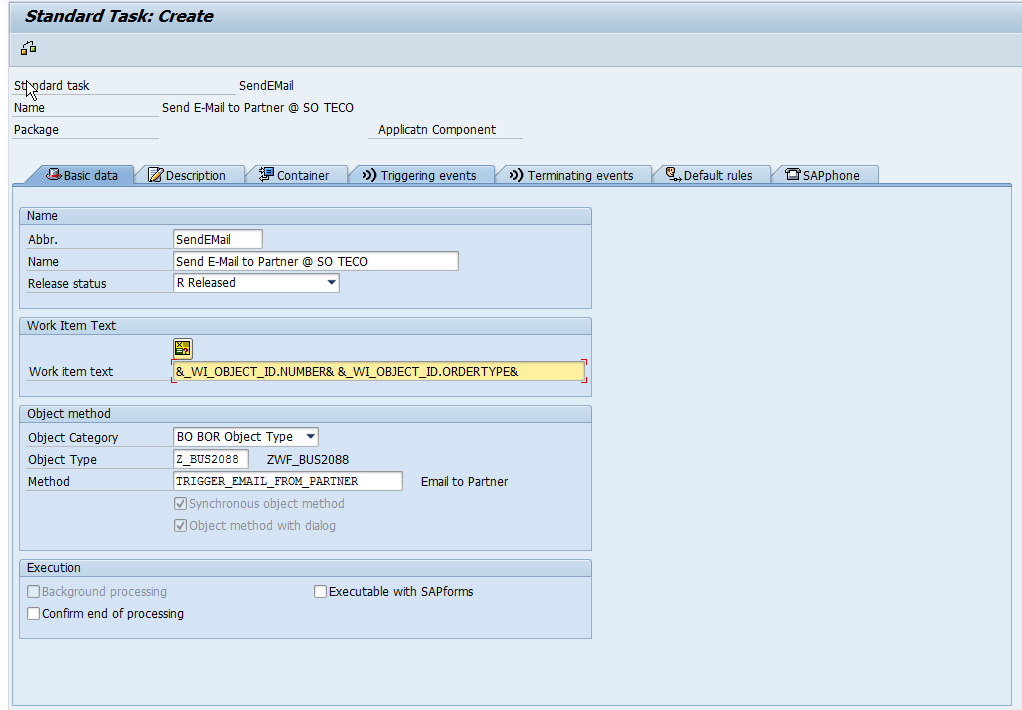
Figure 20 Create a task fully populated
Next, you enter the triggering event by clicking the Triggering events tab (Figure 21).
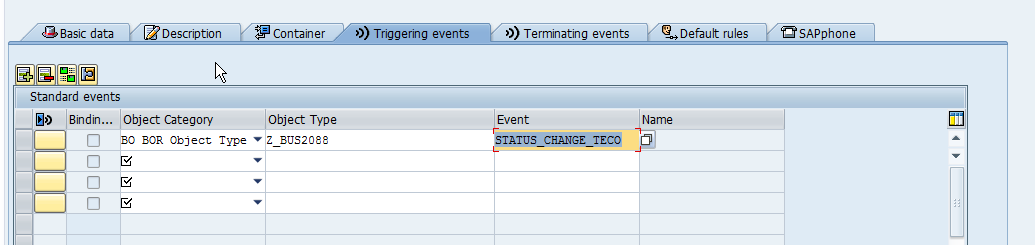
Figure 21 The Triggering events tab
You need to bind the event to the object. This transfers the values from the workflow object to the BOR Object Type. Enter in the Object Category of BO BOR Object Type, an object type equal to the new object created, Z_BUS2088. The Event is the new event created, STATUS_CHANGE_TECO. Press enter to finalize your choices. After you press enter the event creator icon will be shown in the first column, click the event creator icon ![]() to bind the line.
to bind the line.
If you wanted different binding rules, you can maintain these by clicking the call binding editor icon.![]() . Typically you need to do this only if you add special or custom parameters to the business object that you transfer from the ABAP method into an object container for the next workflow task. That’s beyond the scope of this article, but it is one more area for you to be aware of when you begin using this functionality.
. Typically you need to do this only if you add special or custom parameters to the business object that you transfer from the ABAP method into an object container for the next workflow task. That’s beyond the scope of this article, but it is one more area for you to be aware of when you begin using this functionality.
Once you see the status active icon ![]() , the new event has been bound to the object. Click the save icon
, the new event has been bound to the object. Click the save icon ![]() .
.
When the workflow binding is saved, the workflow trigger is active.
Next time, we will talk about testing this new workflow. thanks for reading,
As always, thanks for reading and don't forget to check out our SAP Service Management Products at my other company JaveLLin Solutions,Mike