
Continuing on with our workflow series 🙂
Step 3. Create the Methods and Events [Heading 2]
This step provides you with the power of workflow. This action requires the use of methods and events. Think of an event as the trigger, in this case the change in the status of the service order. Methods are code that is executed when someone pulls the trigger.
Now, you could use the existing event teccompleted, as you can see below in Figure 7, but for demonstration purposes, I walk you through creating a custom event. First, you create an event in BO Z_BUS2088 for the status change.
Using transaction code SWO1, enter Object/Interface Type: Z_BUS2088, if it isn’t already populated. Click the Change button ![]()
In the next screen select the event line and click the create icon![]() . In the pop-up dialog box enter the event name, as shown in Figure 7.
. In the pop-up dialog box enter the event name, as shown in Figure 7.
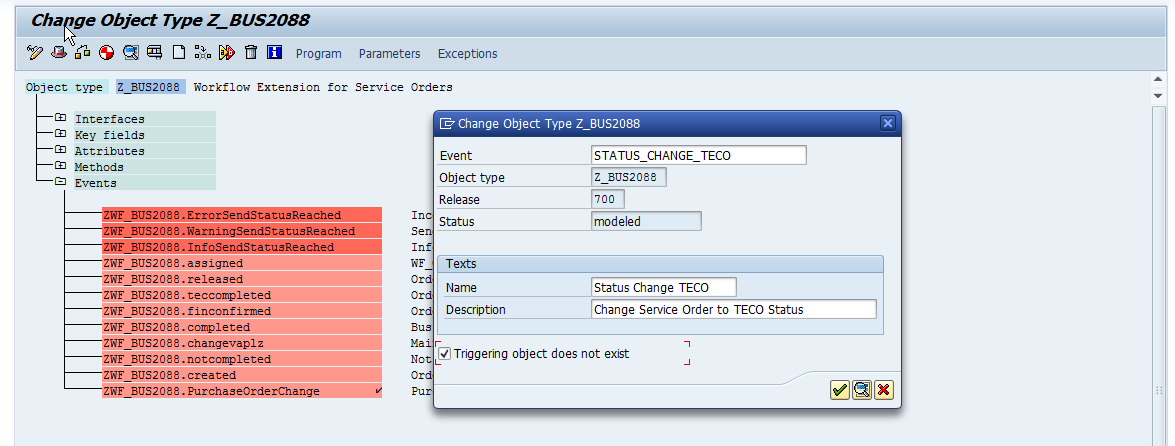
Figure 7 Create a new event
This action adds a new event to the bottom of the list as shown in Figure 8.

Figure 8 Event added
To activate the new event, remain in the Change Object screen (Figure 7) and follow menu path Edit > Change Release Status > Object Type Component > To implemented.
Then follow menu path Edit > Change Release Status > Object Type Component > To released.
Your next step is to create a method, which is where the code resides. Keep in mind that you still need some development to perform the task. Depending on authorization, this may require assistance from an ABAP developer. This time, select the Method line, as shown on Figure 9 and click the create icon![]() .
.
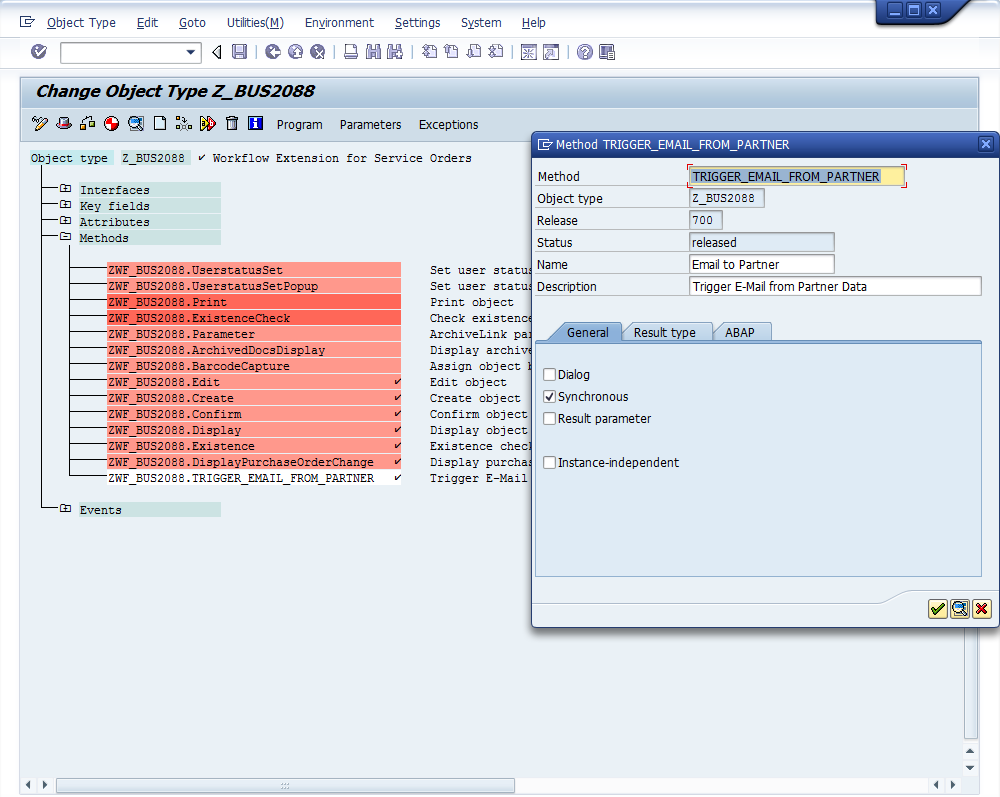
Figure 9 Create a method without reference
You can either choose to create a method with a function module or as an ABAP method or routine within the program. Figure 10 appears after you click the create icon. If you click the Yes button, you can enter an existing function module to be used as a template. If you click the No button, you can create the method manually. In this example, I create the method manually.
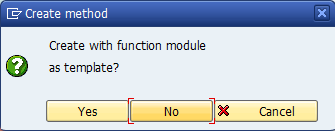
Figure 10 The Create method pop-up window
The next step is to implement the method we just created. Scroll down the screen until you find ZWF_BUS_2088.TRIGGER_EMAIL_FROM_PARTNER. Follow menu path Edit > Change Release Status > Object Type > To implemented (the system warns you through error messages if you forget this step) as shown in Figure 11.
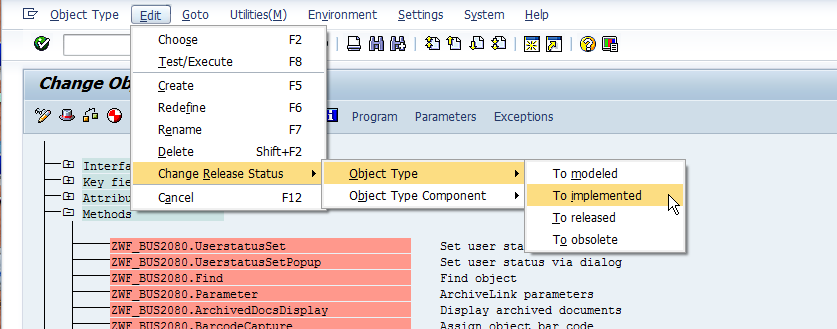
Figure 11 Implement the new method
Implementing the method allows you to put code into the method. To do this, place the cursor on the method ZWF_BUS2088.TRIGGER_EMAIL_FROM_PARTNER and click the Program button shown in Figure 12. The first time you click the Program button for this method you need to generate the template. When the pop-up screen appears, click the Yes button.
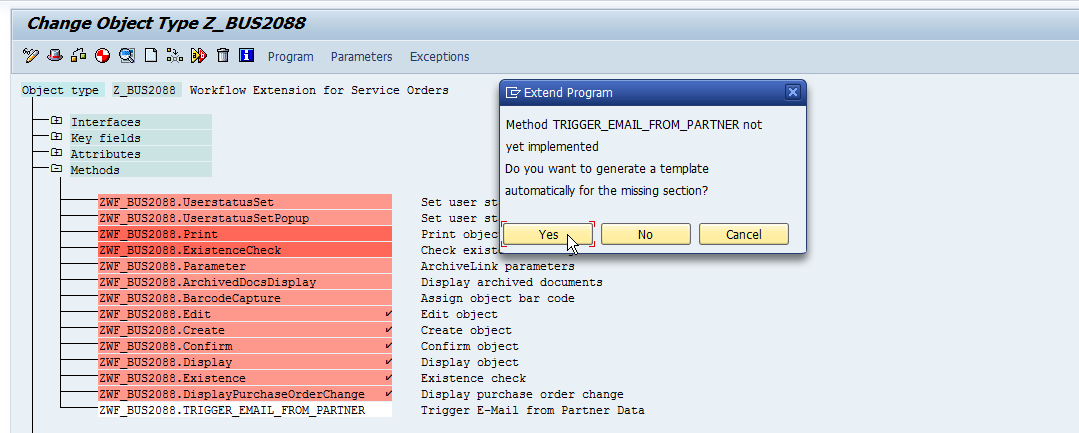
Figure 12 Add code to the method
Generating the template for the method sets up the initial code to work within the method. Generating the template also displays the ABAP editor (Figure 13). Enter your code after line 15. Be sure to end your code with the END_METHOD statement, shown currently in line 16.
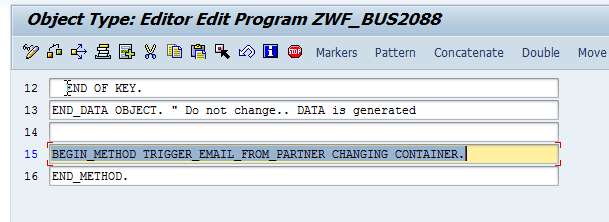
Figure 13 Enter the code within the method
To help you test that it is working, I encourage you to add the code shown in Figure 14 after line 15 (Figure 13):
CALL FUNCTION ‘TH_POPUP’
EXPORTING
CLIENT = SY-MANDT
USER = ‘USERID’
MESSAGE = ‘This workflow works’
EXCEPTIONS
USER_NOT_FOUND = 1.
Figure 14 Sample code
You should now be able to release your method by following menu Edit > Change Release Status > Object Type Component > To released. Releasing the method adds a check mark at the end of the name of the method to show that it is released (Figure 15).
![]()
Figure 15 The released method
Next up, we will cover setting up the workflow trigger. Thanks for reading,
As always, thanks for reading and don't forget to check out our SAP Service Management Products at my other company JaveLLin Solutions,Mike