A while back, a good friend of mine showed me that workflow really isn’t that tough. Some of the things I assumed about SAP Workflow included:
- You can’t do it without implementing a lot of HR configuration
- You have to do everything in the SAP Inbox
- It would take months to get a workflow up and running
- The workflow always becomes lost in “limbo”
While all of these things may be true in some instances, it doesn’t have to be the case. This next series of blog posts is going to prove it. Now, if you need to set up a multiple step process involving several groups with delegates if someone is on vacation and complicated logic depending on the values set in the document, this process won’t be enough for you. The goal is to expand your toolbox for simple tasks.
Why use SAP Workflow when I can use a user exit or an enhancement spot? That’s an excellent question, and in many situations, user exits are the best approach. The biggest difference between workflow and the more standard user exit/enhancement spot approach is how and when it executes. Let’s look at two Service Management examples.
Example 1. You need the system to verify data that was entered into the document every time you save. The service order needs to have an accounting indicator set based upon custom logic. It does not have to be complicated, but to make sure the downstream processes work, you need a correct value entered. A user exit is perfect for this approach because you want to force users to enter a correct value before they can save the document.
Example 2. You need to kick off an email to customer service representatives as soon as a particular status is set so they can generate a quotation to the customer. For this purpose, SAP Workflow is a much better option. You don’t need the code to execute every time you save the service order. You only want it to happen when the particular status is set. You could write code to do a quick check of the status to see if it should execute, or write a background program to check every service order every five minutes, but why write that logic when it already exists in the SAP system and doesn’t cost you anything?
The example I’ll start today illustrates how to send an email as soon as the service order is assigned a status of TECO (technically complete). This functionality exists in nearly every SAP module. Often you just need to find the correct business object to complete this process. Figure 1 lists a very small sampling of the available business objects. Once you determine the appropriate object, you can follow the step-by-step instructions to activate your own workflow.
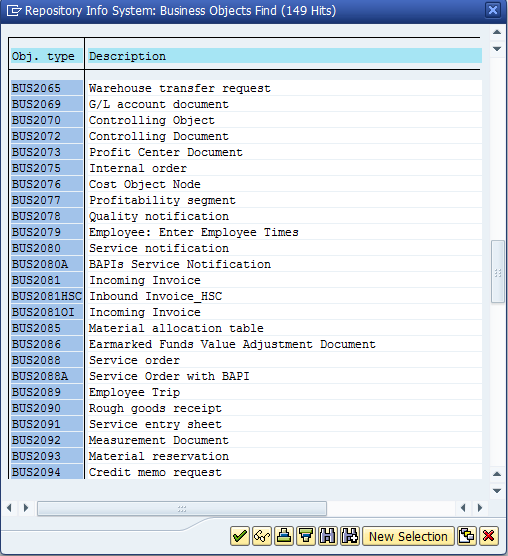
Figure 1 A sample of available business objects in standard ERP
Step 1. Initial Customizing for Workflow
Transaction code SWU3 is the standard transaction for automatic workflow customizing. This is a single transaction that allows you to set up the configuration needed to start using SAP workflow. This is a one-time setup for each system. This configuration step must be done in every system needing workflow. This transaction sets up all the remote function calls (RFCs) and background jobs to manage tasks. In a system that has not used any workflow, the SWU3 transaction initially looks like the screen shown in Figure 2.
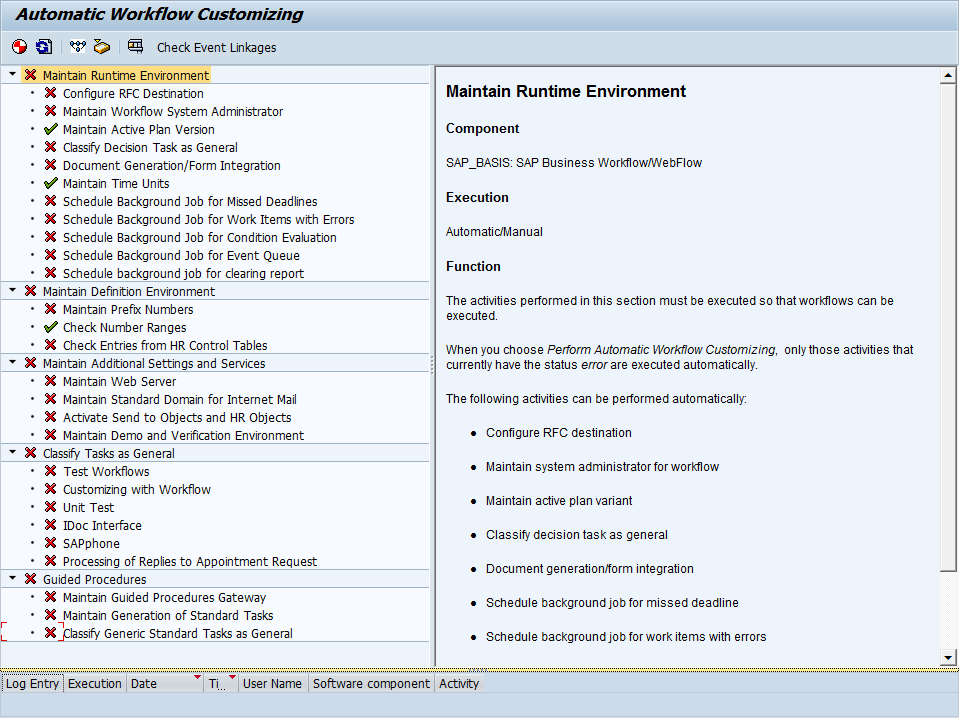
Figure 2 The initial screen for automatic workflow customizing
You need to go through each line item in Figure 1 that shows a red X and click the perform automatic workflow customizing icon . Pressing this icon activates each function you need using the default settings. The default configuration suffices for the majority of simple workflows. Note that the icons to the left of each task change from a red X to a green check mark. When your customizing is complete, the list looks like the screen in Figure 3. Note that not every line needs to have a green check mark. Certain lines on the screen would require additional configuration; however, those steps are not required for the type of workflow I demonstrate.
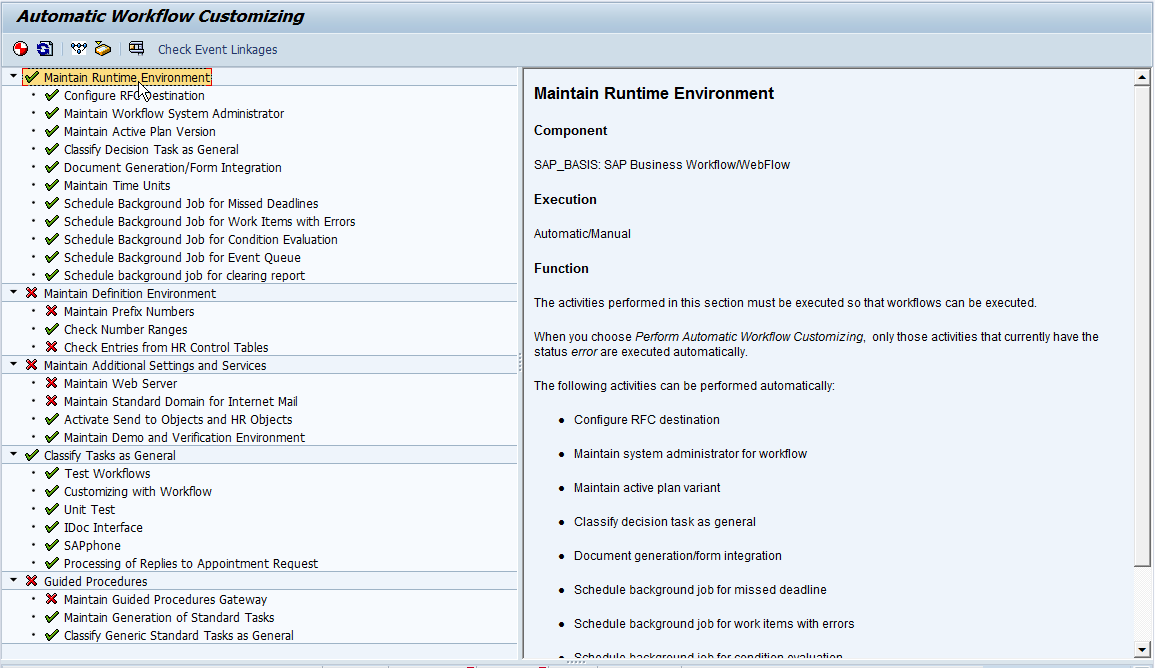
Figure 3 The Automatic Workflow Customizing screen after customizing is complete
Note
The action Maintain Workflow System Admin creates the user WF-BATCH. This is the user against which all the workflow functions run. You need to work with your security team to ensure this user has all the authorizations needed to execute any workflows.
Don’t want these to get too long, so I’ll pick up tomorrow with the next steps. Thanks for reading,