SM

Home / SAP / Archive by category "SM" (Page 4)

Service Management – Basic Order View Functionality

I recently got to play with something new to me.  The Basic View functionality make the service order a little more like the service notification in terms of it’s screen design.  The premise is that you can build your own tabs, add your own segments, etc.  Awesome.  In reality, it is still lacking in my opinion.  Here’s how to configure it.  I’ll explain what is missing as I go.

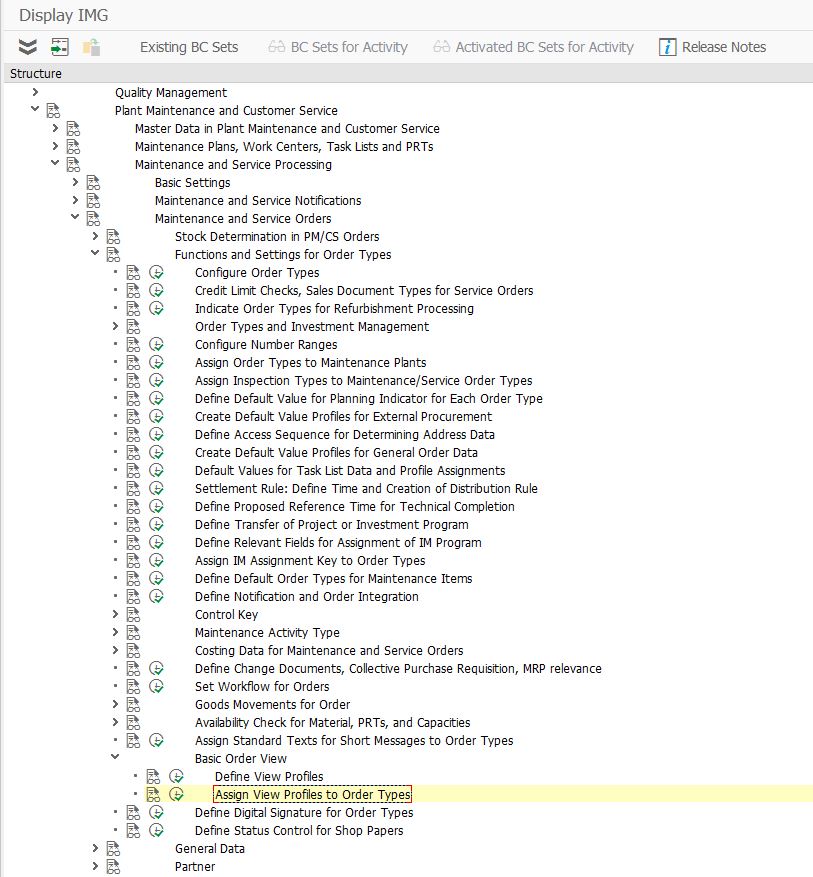
First, this is where you find it.  This IMG path is only available in newer versions.  I don’t remember when it became available.

First, we define the view profile.

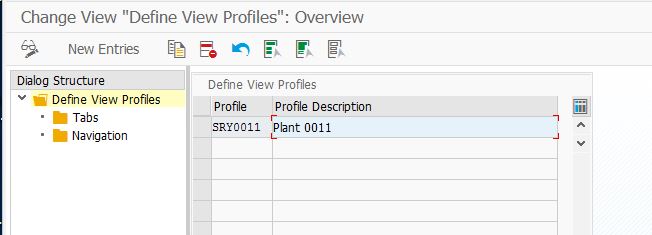
This is pretty straightforward.  Create a entry, give it a name and a description.  Then, double click into the tabs folder.

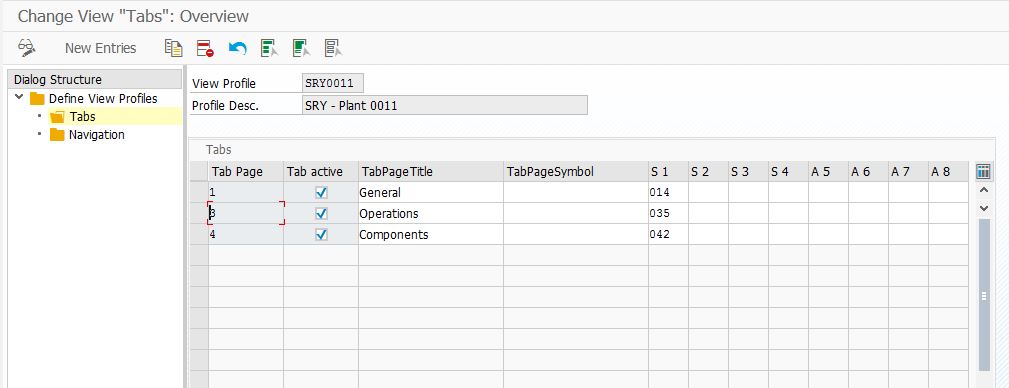
Here, you create a row for each tab you want to show up.  Keep in mind, once you activate this functionality, all the original tabs disappear for this order type.  You will only display what is shown here.

This is my biggest complaint with the functionality.  You only get these sections to add to the service order.  You lose the objects tab, which is one of my go-to views in service.

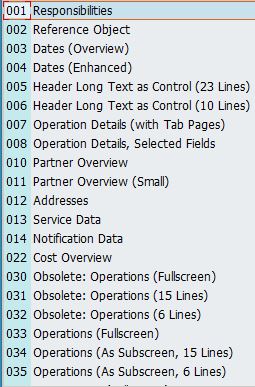
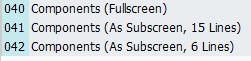
Each tab can have up to 8 sections.

Once you finish the tabs, you can go to the Navigation area.

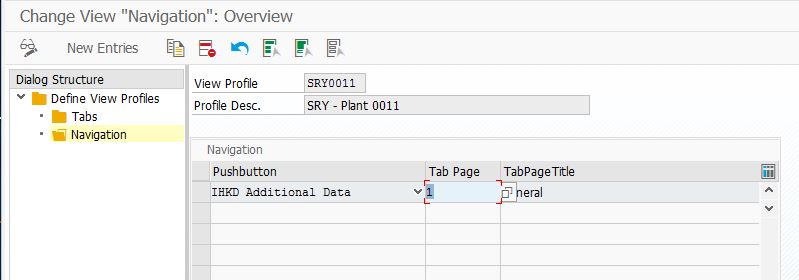
Here you get the opportunity to add buttons.  This sounds great, but in my testing, they never showed up.  If they were working, here are the options you can do.

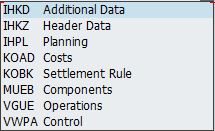
In theory, you get the additional data and control tabs back, but still no objects.

In general, the sections look a little nicer than the original IW32, but overall, not much of a change.  I like the functionality, but it still seems limited from the original.  I configured this, then deleted it all.

Thanks for reading,

Service Management – Install Base going away in S/4???

I recently heard that SAP has plans to get rid of the IBase in S/4.  I found this rather interesting since the IBase has done almost nothing in ECC for it’s entire existence.  I hear that SAP has a new web based product AIS, I think, that is around managing assets particularly geared toward internet of things.  I know nothing about this new product, but I’m hoping to learn more about it at SAPPHIRE this year.

The thing I find most interesting is that SAP is saying the IBase is going away, but what does that really mean?  I have to imagine there are customers using it.  If that is the case, they can’t just remove the transactions and tables.  But to say that SAP won’t support it is a bit of a joke.  The install base in ECC has almost no functionality.  There is no configuration available (if you want a new category, you need to maintain a table).  There are no BAPI’s or API’s to populate the IBase.  There isn’t even a history record created out of the box.  And there is NO integration with anything else.  Say if you wanted to look at your serial number history and see that it is attached to an IBase, well good luck.  You will need to design that yourself.

I know the IBase has a lot more functionality in CRM, but since none of that functionality has been copied to ECC, seems like SAP isn’t about to stop supporting it, but rather they never supported it in the first place.  To me, this is sad, since I prefer the layout of the IBase compared to a serial number hierarchy or functional location.  But the lack of integration is disappointing.

I’d love to hear your thoughts on this.  Do you use the Ibase?  Have you built any custom logic to support it?

Thanks for reading,

Service Management – The Exchange Process Continued

Well, this has turned out to be more of a challenge than I originally hoped.  Nothing new in the world of service.  ha ha.  I originally started off looking for a way to automatically generate the service order for an advanced exchange (if you do an in-house repair it works great, but if you send out an exchange unit before you receive in the original, it breaks the process).  The standard program SDREPA01 gave me a clue about the item status.  However, it turned out to be a false hope.  I was able to change the status and SDREPA01 ran…  but still did nothing.  The reason was because the repair line still wasn’t defaulting in the order.  Without going into a bunch of boring details of my debugging expedition, let me skip ahead and let you know what I did find.

Getting the item to default would most likely involve lots of user-exits or possible system mods…  neither of these met my goal (to be able to build a program that any client could use without doing any system modifications).  What I found is that I could use a BAPI to add a line to the sale order, but it still wasn’t pulling in all the details I needed.  After more digging, I think the reason had to do with the serial number (or lack of) in my newly created line.  AFter more digging, I located records I had previously not noticed in the tables SER02 & OBJK.  I’m currently experimenting with a few functions that will reserve a number and populate these tables for me.  If I can pull together the right combination I think I will have my method handle Advanced Exchange.

For anyone that is curious, here are the functions that I need to execute (along with a bunch of other logic to populate them).

  • BAPI_SALESORDER_CHANGE – to add the new line item to my sales order
  • OBJECTLIST_NUMBER – this will pull a new OBKNR for table SER02
  • IWOU_POST_SER02 – to create the OBJK & SER02 entries

As soon as I finish pulling it all together, you may be seeing a very excited post 🙂  otherwise, it’s back to the next round of debugging.

Thanks for reading,

Service Management – Adding a Department Responsible

Since I was already playing around in HR, I thought I might as well show this one too.  Since the notification allows you to enter a person responsible, which we demonstrated earlier this week (note, you don’t even need to add it to the work center to make it available in the notification).  Now, let’s show you how to make your own departments.

Please note, if your company is using HR, you most likely will have to follow a more structured process, or someone may have already done this for you.  If not, here’s how to do it.

Transaction:  PPOCE

If this comes up, I suggest backdating it.  Either to the date you turned on SAP or the date your company was founded.  I like 1/1/2010.

Press Green Check

This will bring up a template.  New org unit.

Change the Organizational unit and description.

Press Save.

Now, it might be possible, but for me, I found I needed to back out and come back into the transaction in order to create more departments.  I believe this is because the transaction expects a structure.  So if you wanted, you could first create your company name, then in the top right pane, press create.

Select Is line supervisor of

Then again, you can fill in the short name, and description and press save.

if you use this method, you can enter in multiple without leaving the transaction.  That’s all there is to it.

Thanks for reading,

Service Management – System: Item 002000 for schedule line 001010 is in the work area

Well, I ran into an issue recently where my repair orders worked great if I only had a single line item.  However, if I added an additional line item, I was getting error message:  v1357

System: Item 002000 for schedule line 001010 is in the work area

I did some initial googling, and it was pointing me to some quality transaction, OQ77.  I took a look, but nothing going on there.  Eventually, after some debugging I found that some custom code was resorting an internal table XVBAP.  This took me some time because I was expecting the issue be around VBEP, so eventually I found where the error happened and started to work backwards, and I finally made the connection to XVBAP.  Once I figured this out, it was pretty easy to look through the custom code and see where the issue was occurring.

If you see this error, check to make sure you didn’t accidentally resort an internal table.  The sequence is rather important 🙂

Thanks for reading,

Service Management – Adding technicians to a work center – part 2

Yesterday we made the personnel record.  Today, let’s assign it to our work center.  I already have a work center called Service, so we will use that.

Transactions CR02

Press Enter

Press the HRMS button.

If this is the first time you have added a personnel record to your work center you will see this screen.

Press Create HR work Center button

Enter in your Work Center name again for Object abbr. and press green check.

Expand the folder down and highlight person (as shown below)

Then press the Create button.

Enter in your personnel record and press Copy.


Your person is now assigned to the work center.

Just press Save again and your done.

Hope this was helpful.  Thanks for reading,


Service Management – Adding a Person to a Work Center

Recently, I had to reacquaint myself with the HR system to attempt to add some personnel records to my work center.  Now, just to let you know, you don’t need to assign a person to the work center, but if you choose just to create the record, you won’t see the person in the default drop down list.  If you want the person to show up easily, I suggest adding them to the work center.

First, let’s start by creating a personnel record.  Please note, what I demonstrate here is only for service work centers.  If your company using HR to do things like payroll or benefits, you must work with HR to ensure all the correct values are entered.  (or if you are really lucky, you can skip these steps completely).

First, you need to go to PA30 to create a new person.

Be sure to select Actions to create the first info-type.  You don’t need to select more than one, everything else will just start popping up as you save one window.  Then press Create.

Fill in the required fields:

  • Start date = be sure to backdate this far enough.  I’ll usually go back 5 years to be safe 🙂
  • Personnel area = US01
  • employee Group = 1
  • employee subgroup = U3

Press Save.

Required fields:

  • Last name
  • first name
  • SSN = 123456789
  • Date of Birth = 1/1/1975

Press Save

Required Fields:

  • Subarea = 0006

Press Save

this popup will show up.  If you using an organization structure, you can enter something in here.  If you want quick and dirty, select no assignment.

Press Continue

Make up an address

Press Save.

This popup will likely occur.  If you select the state, it will automatically bring in FED.  If select FED, you will need to manually enter in the state as well.

If you select FED, you will see this popup.

you should see something like this when you are done.

Press Save (twice)  Once for each tax area.

Press Save

Required Fields:

  • Filing status

enter past the warnings

Press Save

Press Save

Required field:

  • PS Group
  • Annual Salary (optional)

Press Save

Press Save

If you receive the following message, just hit the Green Check

Required Fields:

  • Type = 10
  • Number = 240
  • start date = 1/1/2017
  • end date = 12/31/2017

Press Save

Press Save (twice)

Now you are done.  You have a personnel no.  In this example, it is number 4.  If you notice all the green checks, you will see you ended up filling in 5 different info records, even though you only picked 1.

This is enough for today.  Tomorrow I’ll show you how to assign it to the work center.

Thanks for reading,


Service Management – Revisiting the Exchange Process

I’ve been visiting the advanced exchange scenario recently.  One of the challenges I have always struggled with is that if you create a default exchange line as soon as you create the main line and inbound delivery line, that you cannot automatically generate a service order.

So my repair procedure is setup like the following:

101 Accept repair 101 Returns  (default)
101 Accept repair 106 Replacement Part (default)
102 Start repair 102 Repairs 01 (default)
102 Start repair 107 Scrapping 03
102 Start repair 108 Credit memo
102 Start repair 109 Debit memo
103 Confirm repair 103 Outbound Delivery
103 Confirm repair 107 Scrapping 03
103 Confirm repair 108 Credit memo
103 Confirm repair 109 Debit memo

The important part is the 101 & 102 areas.  The repairs line should be able to be added automatically by just visiting the repairs screen.  Unfortunately, this doesn’t work.  What I found out is that it is related to the user status for the main line item.  As soon as you ship out a unit, it sets the status to BDMD (business decision made).  The repair line is looking for BDRQ (business decision required).  With this system status, SAP will ignore this line, assuming that it OK since you shipped a part out already.

My next mission is to see if I can reset this status to be re-opened.  If I can pull that off, it should be possible to have SDREPA01 create the service order in the background.  More to come.

Thanks for reading,

Service Management – Accounting Indicator from DP90

I recently discovered something with DP90 I hadn’t previously discovered.  I was doing DP90, and I had the accounting indicator set as one of my fields.  However, when it added the items to my debit memo request, it wasn’t bringing over the accounting indicator field.  Normally, I might not have noticed this, but I have it as part of my pricing.  So when it wasn’t getting populated, I started scratching my head.

The trick turns out that unless you check the box NoSummarization in the DIP Profile (Transaction ODP1), it won’t copy that field.  I checked the box, and my problems were solved.

Thanks for reading,