Well, with all the work that I did for my Customer SM Portal, I thought I knew what I was doing with the ABAP Web Dynpro, especially around tables and dynamically changing them. I recently started working on a new application that is more scaled back. One of the requirements is to have the same sort of functionality as an ALV Table in the ABAP. So we want to have the filter, sorting, and flexibility to play with your layout and settings. Well, I started to look at the current tables I’d been using, and realized I had to implement each of those functions myself. Well, that looked like a rather big task to undertake, so I went to my buddy, the internet and looked up Web Dynpro ALV Table and quickly found that SAP was nice enough to provide a way to implement the ALV Table. Of course, it meant another change to the way I was doing things… but hey, I learned something new.
First of all, thanks that Sankar. If you like to see exactly how to do this in video format, check out this like. Sankar does a great job in demonstrating exactly how to code this stuff. My only problem is that sometimes it was hard to read the code and class names (which is why I’m going to cover this in text form). https://www.youtube.com/user/sankar1bhatta?feature=watch
So, let me walk you through the steps of how to create an ALV Table. The first step is to add a new Web Dynpro Component. 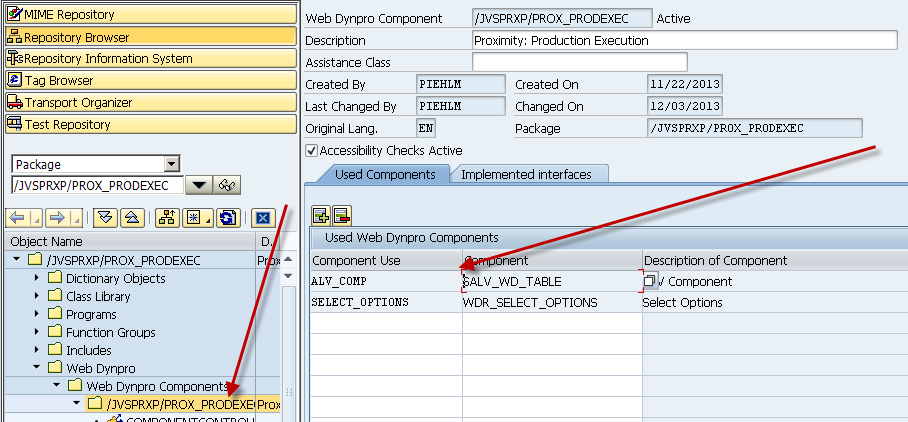
So, go to your top level, and add a Used Web Dynpro Component. You can name the Component Use whatever you like, the component itself is SALV_WD_TABLE. This is the magic that will allow you to use all of the ALV functions. I’m not going to cover this in depth, but the next step will be to add a context node + attributes that will be the structure for the table you want to create. Be sure to create this in the componentcontroller, and not directly in a particular view. This next part was new to me. I believe it’s called external component mapping. So let me walk you through this next part.

First, drill down into the component usuages until you find the ALV component you defined above (mine is ALV_COMP). Next, you need to drag your context (table you want to create in ALV) from the right side, over to the Data node on the left side above. You have now linked that table structure to the ALV components. Finally, we need to add this to the layout so you can actually see the table. So, go to your layout and add a ViewContainerUIElement. Wherever you place this is where your table will come in. We have one final step, and then you’re ready to test.
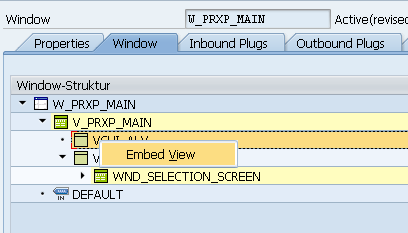
So, go to your window, and find the VCUI element that you just created, and drill down and then right click to Embed View.
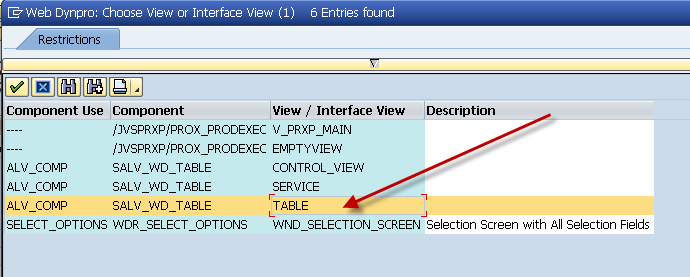
Select the Table interface, and you’re ready to go. Just fire up your application. In some future posts, I’ll discuss how you can customize this, but for many applications, this might be enough.
Thanks for reading,