Using SAP GUI Script
SAP GUI Script is a fantastic tool that can be used to create transactional testing data, Change existing master or transactional data, create master data in mass or even just data conversion for certain tasks that LSMW can’t handle. GUI Script has been around for a while, but it always surprises me that so few people are familiar with it.
The basic concept around GUI script is that you can load information into an Excel worksheet, and using a macro, allows you to load data into SAP. This document is going to walk you through creating your own GUI scripts and using them effectively.
Turning on GUI Scripting
Tranaction: RZ11
Param. Name: sapgui/user_scripting
Press Display
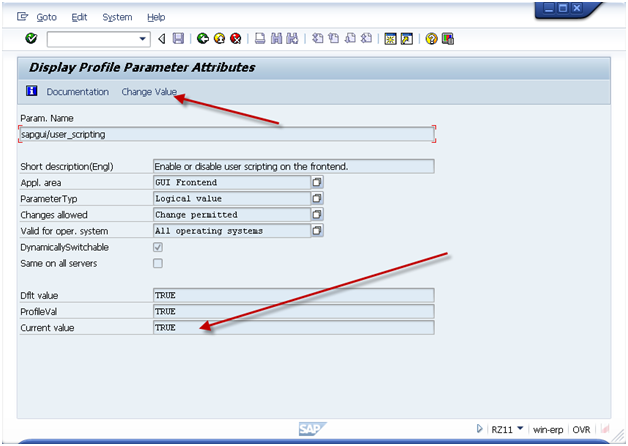
If current value is not set to TRUE, press the Change Value and set the value = TRUE.
Please note, typically this a basis function, so if you don’t have access to transaction RZ11, please contact your basis team.
As an additional hint, if you want to have GUI Scripting always active, it is encouraged to activate it in RZ10 (this adds it to the startup profile).
Recording the Transaction
When you are ready to perform the recording, be sure you know the transaction you want to execute and the data that you can use. You should also know the screens you plan to visit and the fields that you will be filling in. Keep in mind, you can always update the recording file, but the better your recording, the less errors you will encounter.
The important thing to remember is that GUI script can NOT perform any logic. it only works for repeating the same steps over and over again. This means that if you receive an error on some records, but not others, you will need to execute 2 different scripts. One script will do the non errors, and other script will do the errors. You can cut down a lot of time if you can segregate the data early.
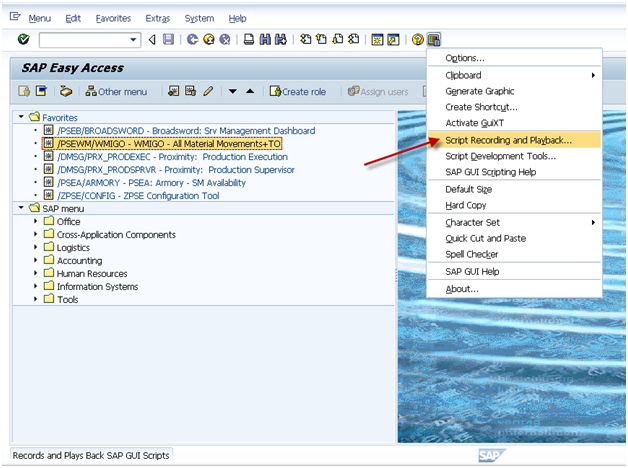
Activate the recorder. It is encouraged to always start the main screen in SAP. This prevents weird things that happens if an error occurs during the playback.
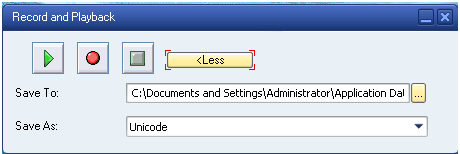
Press More if you want to control where the file is saved.
When you are ready to start, press the record button (Red Dot Button).
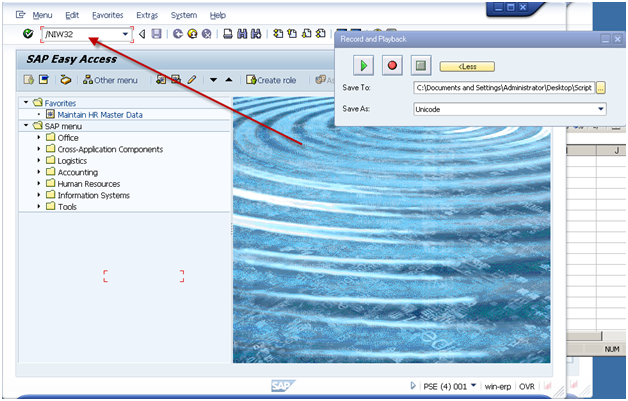
Then proceed to execute the transaction you wish to record.
Be sure to use ‘/N’ in front of the transaction code.
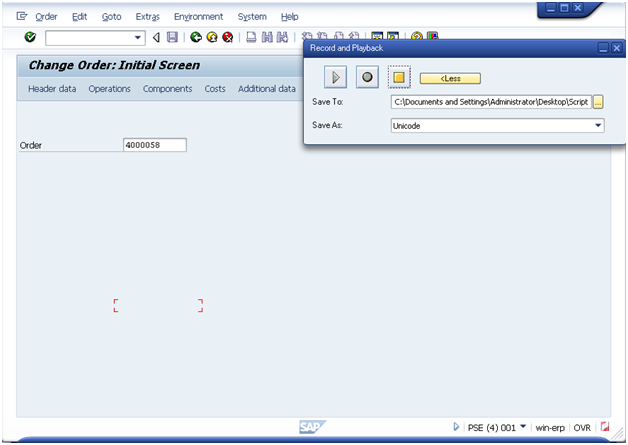
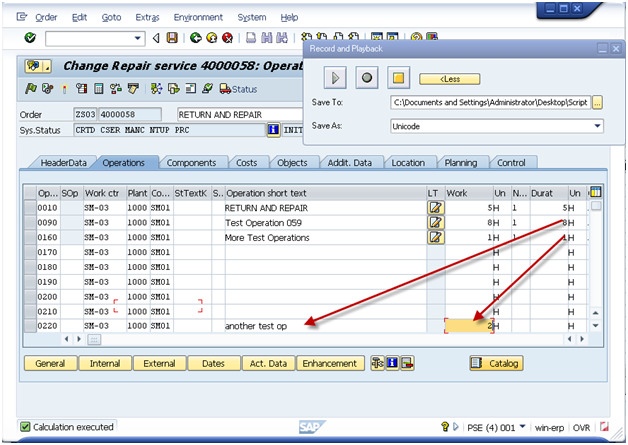
Enter in the document number and press Operations Button.
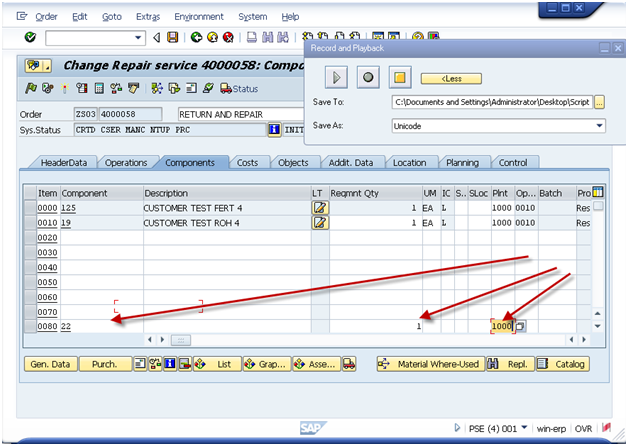
Please note, when I added a new operation, I entered it on the bottom of the screen. This allows you to avoid the risk of overriding exisitng data.
Press Enter.
Press Components Tab
Again, add the data to the bottom of the screen.
Press Enter
Press Save
Note: sometimes there will be errors. If errors occur, you need to remember that maybe not Every order you change will have the error.
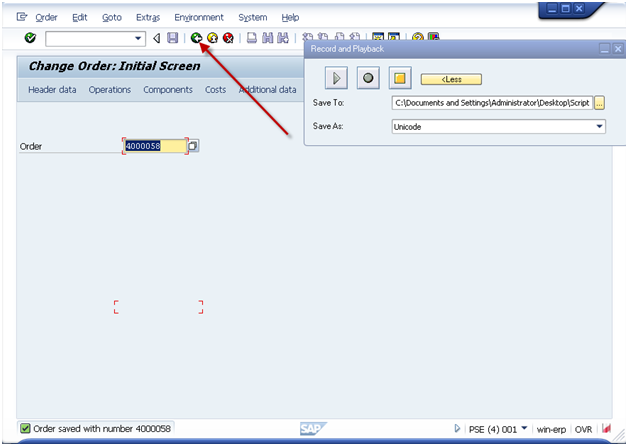
I encourage you to press the green arrow back on every recording at the end. This just helps to avoid incorrect loading of data.

Press stop.
Now, go find the file. Be sure to RIGHT click on it. If you double click on it, it will attempt to execute the exact same transaction again.
You should see something similar to this:
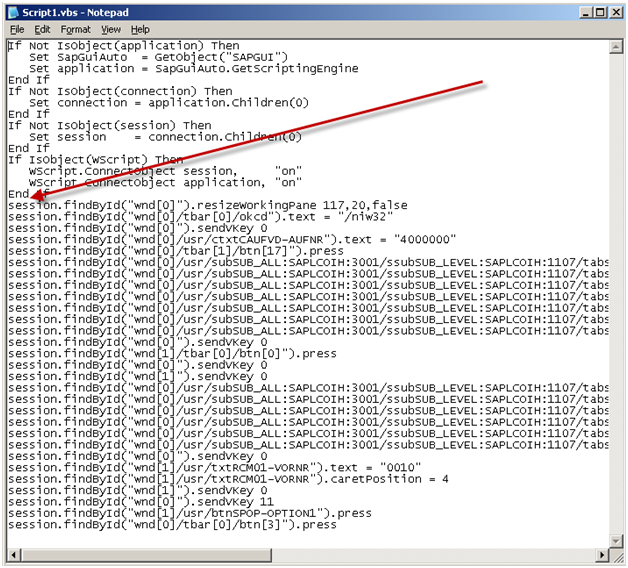
The parts of this file you care about are the lines that start: session.xxx
I encourage you to skip the first line that resizes your screen. and copy all of the remaining lines in the file.
Next up, add this information to the excel file.
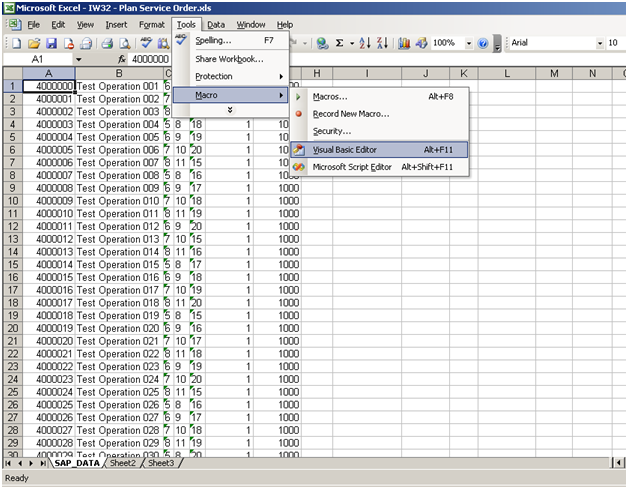
This will depend on your version of excel, but what you need to do is find the macro button:
MS 2003:
MS 2007
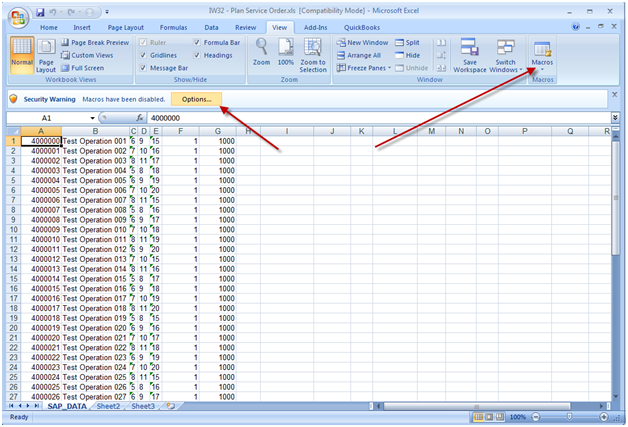
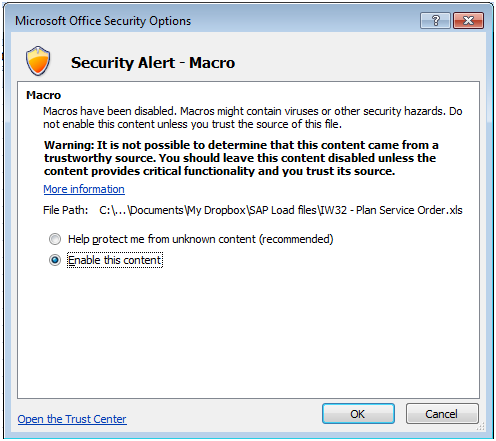
Be sure to enable macros.
When the macro window opens, be sure to select the correct view on the left hand side of the screen. Then move to the code section and find the area shown that says “Paste your recorded script below”.
If there is anything currently in this section, be sure to remove it, and replace it with the information from your recording (session.xxx).
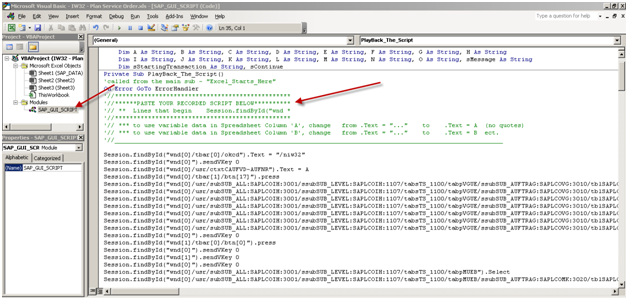
Now, I’m going to show you how to point this to your excel document.
session.findById(“wnd[0]/tbar[0]/okcd”).text = “/niw32”
session.findById(“wnd[0]”).sendVKey 0
Change:
session.findById(“wnd[0]/usr/ctxtCAUFVD-AUFNR”).text = “4000000”
To:
session.findById(“wnd[0]/usr/ctxtCAUFVD-AUFNR”).text = A
session.findById(“wnd[0]/tbar[1]/btn[17]”).press
Change:
session.findById(“wnd[0]/usr/subSUB_ALL:SAPLCOIH:3001/ssubSUB_LEVEL:SAPLCOIH:1107/tabsTS_1100/tabpVGUE/ssubSUB_AUFTRAG:SAPLCOVG:3010/tblSAPLCOVGTCTRL_3010/txtAFVGD-LTXA1[7,8]”).text = “my test op”
To:
session.findById(“wnd[0]/usr/subSUB_ALL:SAPLCOIH:3001/ssubSUB_LEVEL:SAPLCOIH:1107/tabsTS_1100/tabpVGUE/ssubSUB_AUFTRAG:SAPLCOVG:3010/tblSAPLCOVGTCTRL_3010/txtAFVGD-LTXA1[7,8]”).text = B
Since this can get long, I’ll jsut show you the first 2 changes. You’ll notice that I found the first two lines where I entered in data. I changed it to a single letter (no quotes). This is the excel column where you enter in the data. It’s that simple. If anything is a constant, just leave it as it is.
When you’re done, press save and you’re ready to execute.
Executing the Script
Now, the first step before executing the script is gathering all the data. Typically, this is done using SE16, SE16N, or certain reports (IW73, VA05, COOIS, etc). As always, be careful with the data you enter. It’s your user id that will be assigned to the change :).
Once you have the data you wish to execute, simply go the excel worksheet and execute the macro
*** NOTE: Remember, when the script is running you can’t do anything with Excel. You can continue working in SAP, but Excel will be locked for the duration of the script.
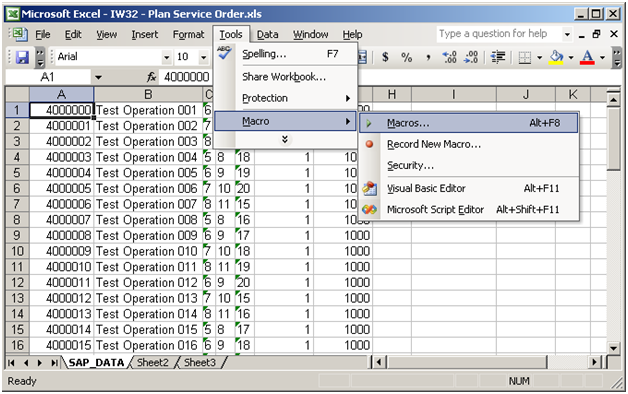
**** NOTE ***
This is a VERY important one. Be sure that the first SAP window open on your screen is the client you wish to change. If you are doubt, be sure to logout of any client/system you do not want to change. For example, if you are logged into production and QA. You want to make the change to QA, I encourage you to log out of production.
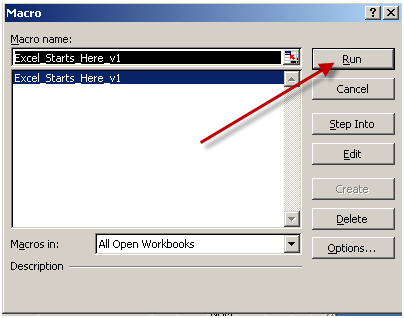
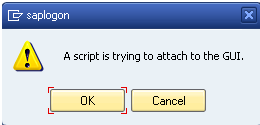
Press Run
Note: if you have multiple excel windows open, be sure the correct macro name is highlighted. If you aren’t sure, close the other excel documents.
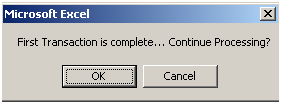
Gui Script will always give you a chance to check the results of the FIRST record.
I encourage you to always check and make sure it saved properly before pressing ok. If it did not, press cancel. Otherwise the script will go all the way to the end.
Once you are done, it will return control back to excel.
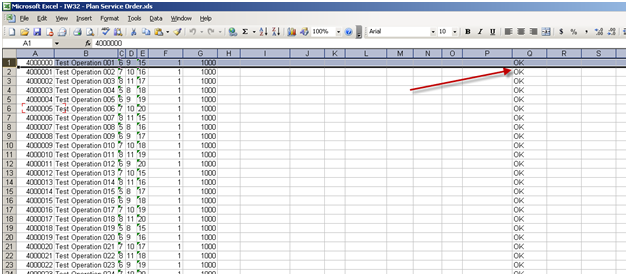
As long as you see OK in the row, the record processed. if you don’t see ok, you’ll need to check that record and possibly reprocess it.

