Recently, I had to reacquaint myself with the HR system to attempt to add some personnel records to my work center. Now, just to let you know, you don’t need to assign a person to the work center, but if you choose just to create the record, you won’t see the person in the default drop down list. If you want the person to show up easily, I suggest adding them to the work center.
First, let’s start by creating a personnel record. Please note, what I demonstrate here is only for service work centers. If your company using HR to do things like payroll or benefits, you must work with HR to ensure all the correct values are entered. (or if you are really lucky, you can skip these steps completely).
First, you need to go to PA30 to create a new person.
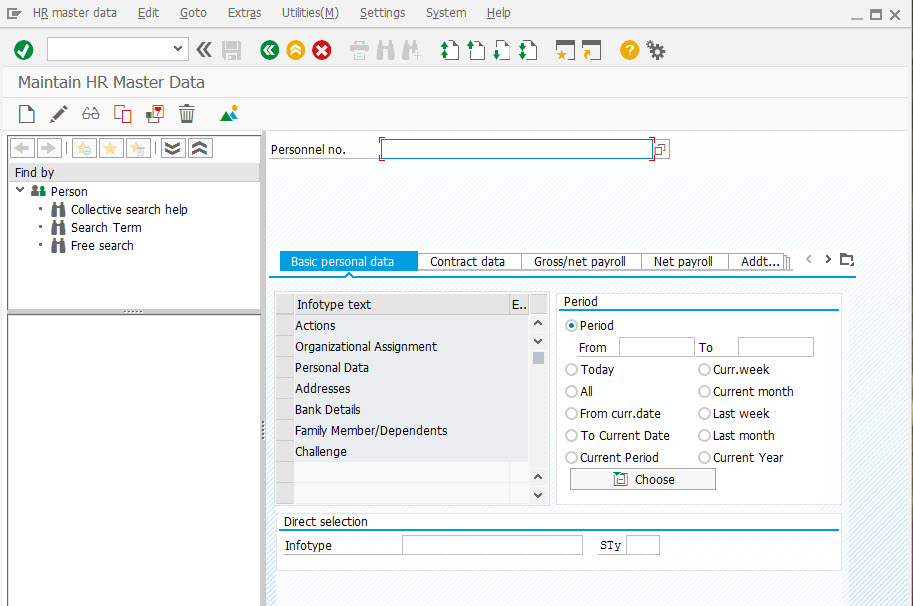
Be sure to select Actions to create the first info-type. You don’t need to select more than one, everything else will just start popping up as you save one window. Then press Create.
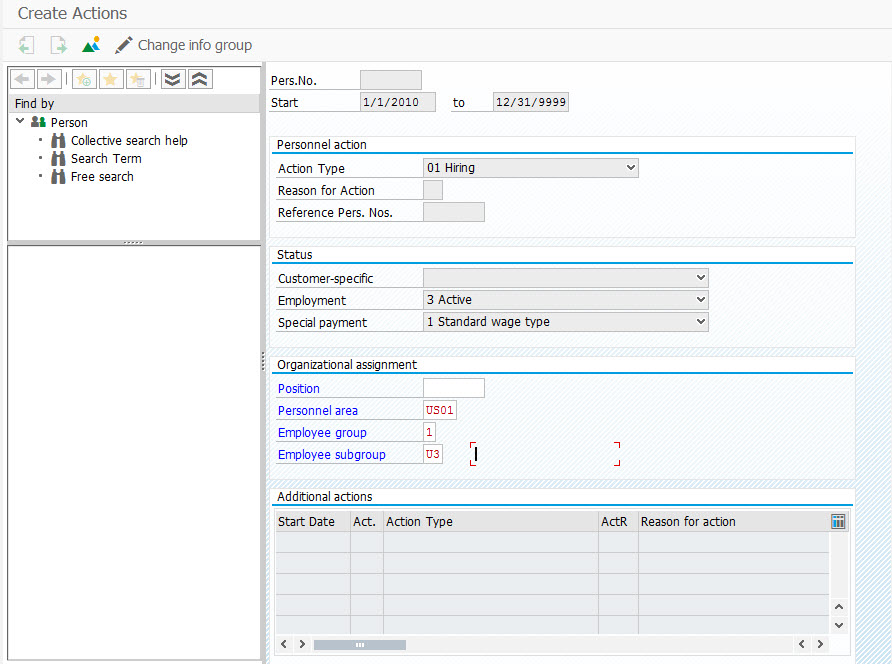
Fill in the required fields:
- Start date = be sure to backdate this far enough. I’ll usually go back 5 years to be safe 🙂
- Personnel area = US01
- employee Group = 1
- employee subgroup = U3
Press Save.
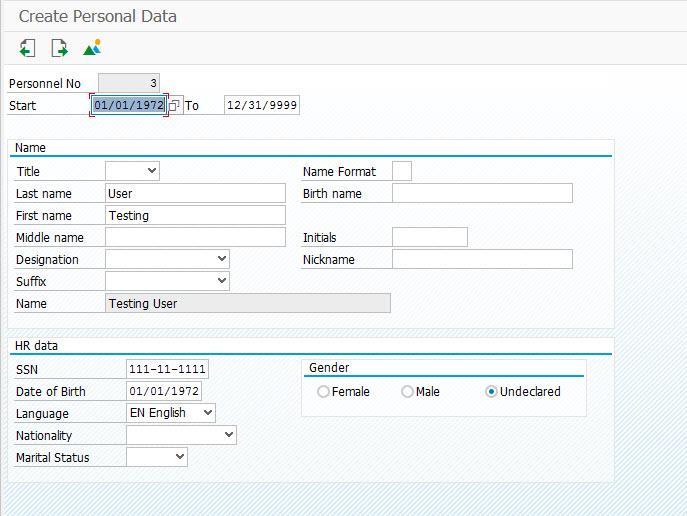
Required fields:
- Last name
- first name
- SSN = 123456789
- Date of Birth = 1/1/1975
Press Save
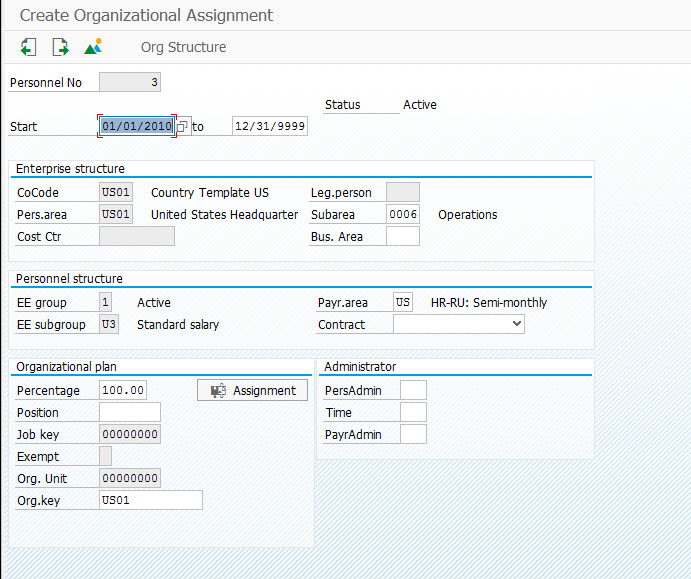
Required Fields:
- Subarea = 0006
Press Save
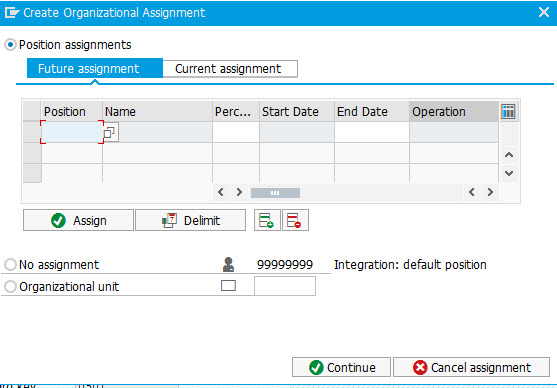
this popup will show up. If you using an organization structure, you can enter something in here. If you want quick and dirty, select no assignment.
Press Continue
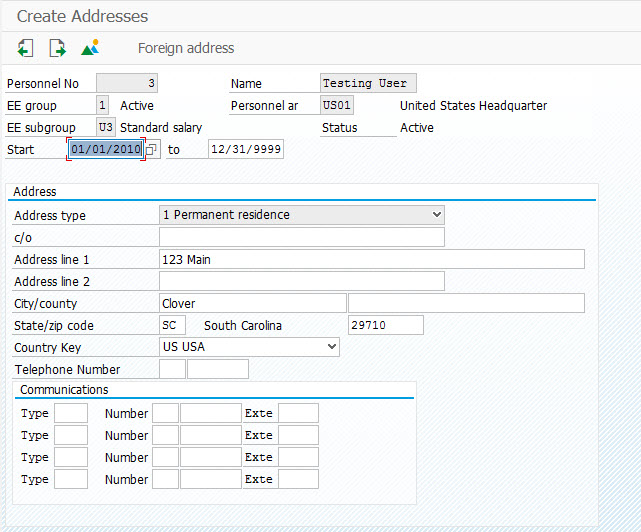
Make up an address
Press Save.
This popup will likely occur. If you select the state, it will automatically bring in FED. If select FED, you will need to manually enter in the state as well.

If you select FED, you will see this popup.
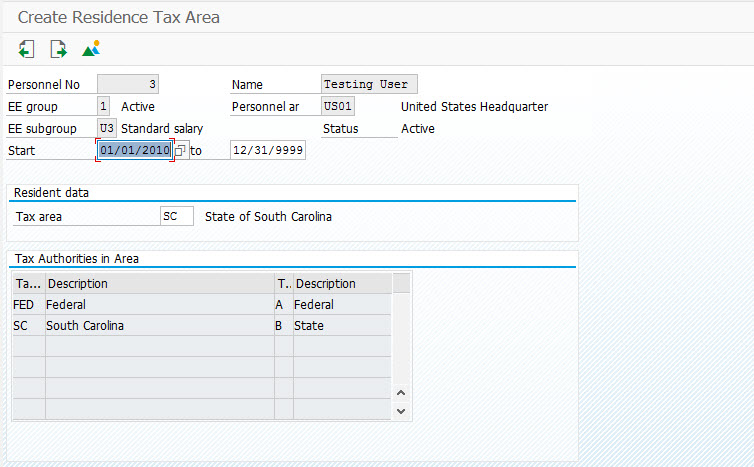
you should see something like this when you are done.
Press Save (twice) Once for each tax area.
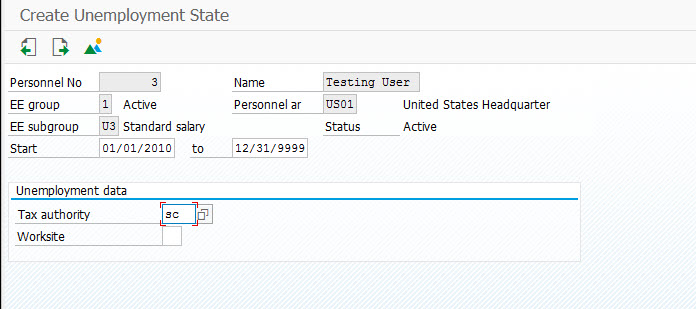
Press Save
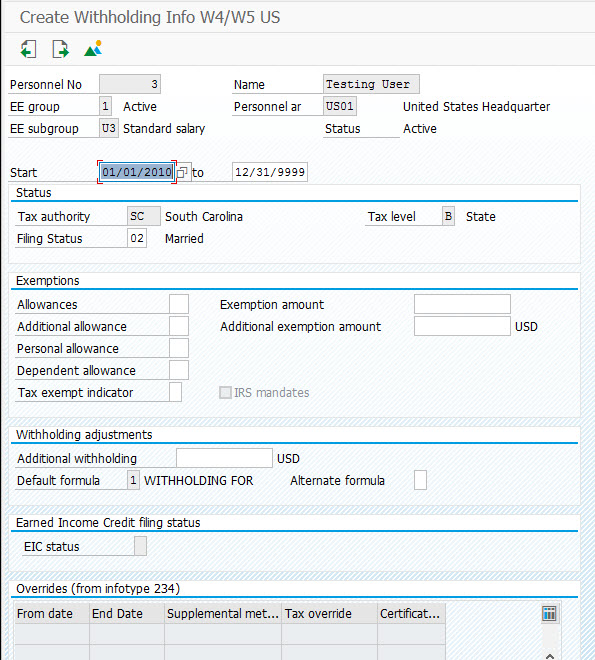
Required Fields:
- Filing status
enter past the warnings
Press Save
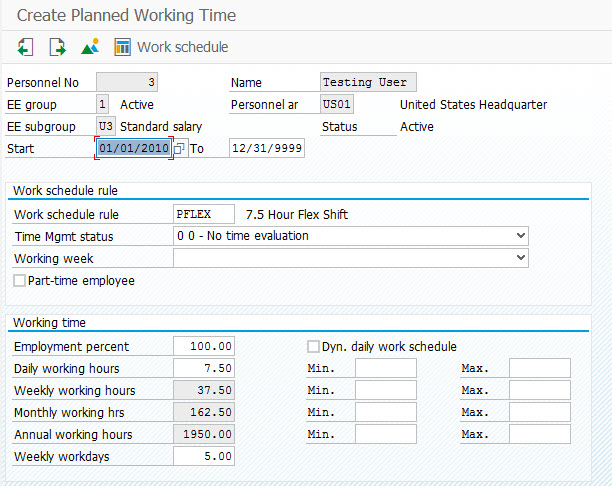
Press Save
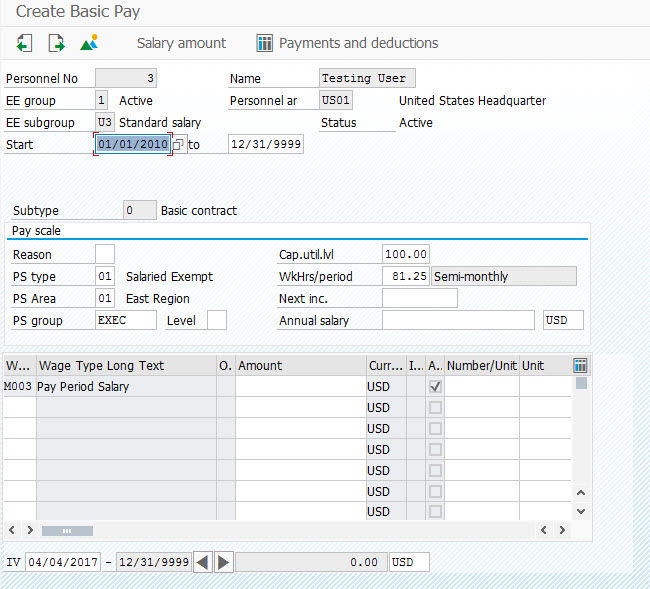
Required field:
- PS Group
- Annual Salary (optional)
Press Save
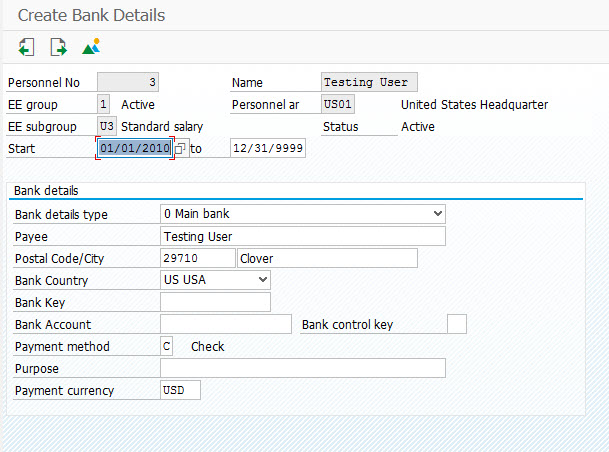
Press Save
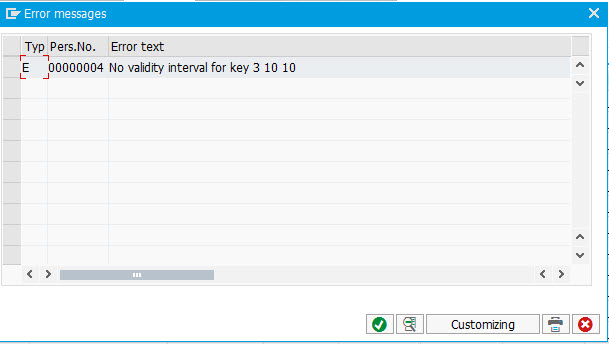
If you receive the following message, just hit the Green Check
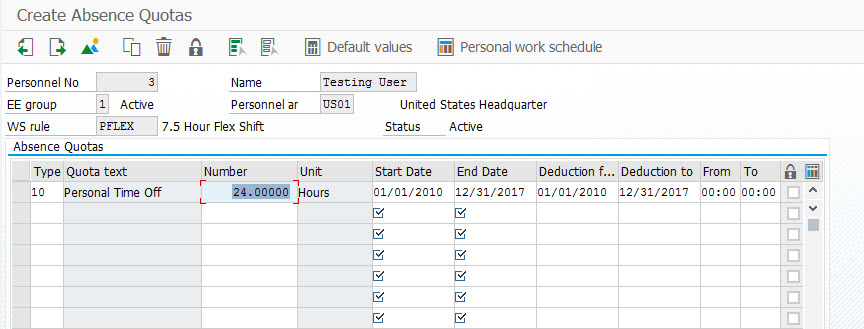
Required Fields:
- Type = 10
- Number = 240
- start date = 1/1/2017
- end date = 12/31/2017
Press Save
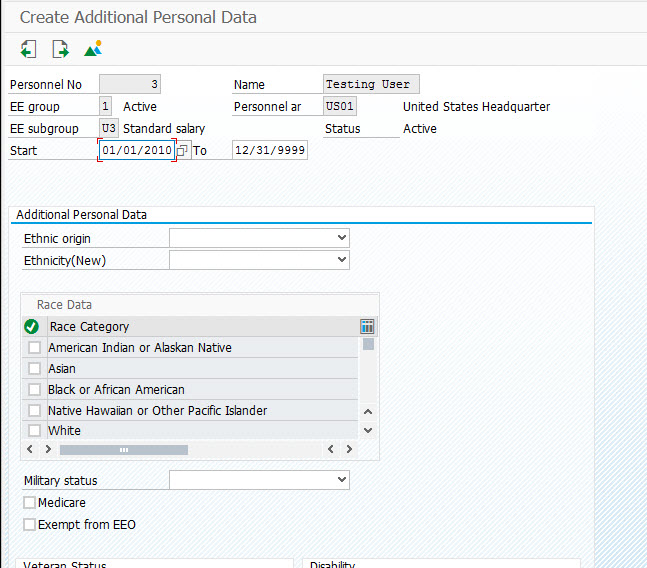
Press Save (twice)
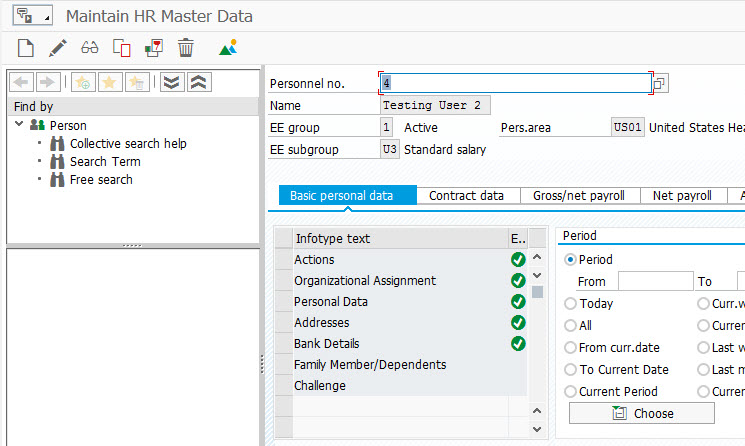
Now you are done. You have a personnel no. In this example, it is number 4. If you notice all the green checks, you will see you ended up filling in 5 different info records, even though you only picked 1.
This is enough for today. Tomorrow I’ll show you how to assign it to the work center.
Thanks for reading,
As always, thanks for reading and don't forget to check out our SAP Service Management Products at my other company JaveLLin Solutions,
Mike
