Website – Test your contact page

Well, I just learned a valuable lesson (the hard way as always).  I recently got a voicemail from a perspective customer trying to get in touch with me.  She mentioned that she had sent us an email from the contact page, but I never got it.  Needless to say, that was weird…  so the first thing I did was go the contact page and send myself a message…  strangely enough, it never came through.  So I went to the webpage configuration…  and found that the email that was set up didn’t exist.  UGH!!!  so now I sit and question how many leads did I miss out on???

Anyway, learn from me, test all of the methods on your website that can be used to contact you.   contact pages, phone numbers, etc…

Service Management – Equipment Hierarchy

Today I’m heading back into the Service Management realm.  I wanted to talk about something that is relatively simple, yet immensely cumbersome in practice.  That’s right, the equipment hierarchy.  When I say the equipment hierarchy, it may also be known as the equipment structure.  It is the process of linking serial numbers/equipment records into a structure or hierarchy.  The principal is very simple, and I’m going to walk through the process.  After the process, I’ll explain what makes it all so cumbersome (if you haven’t already experienced the pain).

If you go into any equipment record and go to the structure tab.blog-01

in the bottom portion, you’ll find the button:  blog-02 to structure the hierarchy.

blog-03

On this screen, you simply enter in each equipment record that belongs at this “level”.

blog-04

Now you can see that a structure exists.  If any of the equipment records in this list had their own equipment hierarchy, you’d see the Sb-Eq box checked.

Now at the top of the page, you’ll see the button:  blog-05  and it will bring up the entire structure report.

blog-06

My example was pretty simple, but it would also show functional locations, and would show the entire explosion.  So, pretty easy, right?

now, the problem comes into maintaining this.  Up to this point, I’m not aware of any automated way to capture the hierarchy.  Say for example, have a production order with the top level material being serialized, and you use several other serialized components to assemble it.  You must now manually create that structure (now make it worse, and say it’s a production order for 50, you have to repeat the process 50 times).  The issue becomes complicated because you may issue 50 serialized components to make 10 finished goods.  Which 5 items went into which finished product???  Without a high amount of diligence, it becomes highly manual and extremely difficult to maintain automatically.  I’ll be talking more in the future about some methods to begin capturing this information.

Thanks for reading,


Web Dynpro – reset_view

Here’s a cool little trick that I picked up in order to make my dynamic screens even more dynamic.  The reset_view statement turned out to be the piece of the puzzle I needed in order to to have a dynamic screen with multiple variations.  While this may be outside the norm, it’s still a great little trick, and let me show you why.

Here’s the scenario.  I’ve created a view with a set of dynamic elements.  Now the trick comes in that depending on the scenario, even that dynamic screen might change.  When I first set it up, I kept getting a short dump because the system was trying to recreate dynamic elements that already existed.  By adding the statement:

  view->reset_view( ).

at the beginning of the WDDOMODIFYVIEW (which is where I do all of my initialization for the view) that reset the stage, so that I could “rebuild” the view with any elements that I needed.

While this isn’t earth shattering, it just might be the trick you need to keep your ideas flowing.

Thanks for reading,


CRM – Contact Tags

Now that we have a CRM system up and running, and we have our contacts all loaded, we’re slowly learning how to merge them into a cohesive contact list.  But it certainly didn’t just fall into place.  🙂  Once we picked our CRM system (we ended up choosing capsulecrm), the next task was to add contact tags consistently.

This sounds like a simple task, but believe me, even terminology that seems clear can easily be interpreted  in different way.  When my partner uploaded his contacts, first they had no tags.  Then when we loaded up the tags, I proceeded to update the mailchimp mailing lists.  This all seemed to be rolling along great.  Until my partner took a look at the lists and started asking where some of the contacts were.  I looked in the mailing list, and proceeded to determine that several hundred contacts were in the wrong list.  So that meant I needed to delete them from the mailchimp lists, and then go back to CRM and change the contact tags.  After a few hours of rework, I thought we were ready to try again…  So I asked Mike if all the changes were good, and he told they were.  So to be sure, I took a look at a few of the contacts and asked Mike what list they should go in…  again, we were off the mark.

So, today, after some going back and forth, I finally got a clue and documented the tags and listed what mail chimp list each list should move to.  So, the lesson learned is document early and save yourself a bunch of rework =)

thanks for reading.

Marketing – improving the SEO of our blog posts

Lately, I’ve had to put more time and effort in my marketing.  One of the things I learned is to improve the SEO (Search Engine Optimization) of my blog posts.  One of the major things I missed when I wrote most of my blog posts is the use of the little SEO traffic light provided by Word Press.  While it may not be the best, it at least gives me an idea of when my post has a chance for a search engine like Google to find my posts.

The idea is that if my posts could actually be located in a Google search (or Bing, or etc…) means more people might start finding my posts (exactly like you did).  Since I’m still on the hunt for second customers, the more people that see my blog the better.  If you aren’t familiar with the concept of the second customer, it’s the consultants, friends, or former clients that know and trust me enough to recommend me to others that might be able to use my software creations.

Well, to get back on track, I completely skipped entering the metadata tags for each of my posts.  Thus it made it that much harder for people to find my blog posts.  So my latest mission has been to go back to all of my posts and enter in the metadata.  In addition, I’ve been cleaning up titles and adding some keywords to try to get all of my “best” posts into the green.  So, take my advise.  If you start blogging, start early and get as many posts into the green for SEO as possible.  It’ll help you in the long run.

Thanks for reading.


Variant Configuration – OEWB Parameters

In the cool Order Engineering Workbench (OEWB) for Variant Configuration there are a number of settings that you can control using the OEWB Parameters.  Today I’d like to talk about the ones I’m familiar with.  While this topic should be a simple one, I’ve had a tough time finding any documentation on exactly what these parameters do and why they should be set one way vs. another.

/OEWB/P_COCH    X       OEWB: Copy Characteristic Values – this is used when attempting to insert another configurable material or classified materials below a configurable materials.

/OEWB/P_EXPL      X      OEWB: New BOM Explosion – Component – if there are char. values on dragged component, structure will be reexploded on drop later.  This is for configurable materials.

/OEWB/P_INST       X      OEWB: Instantiation – this allows you to instantiate a material multiple times within a single BOM.  Beware of potential performance issues if you use this functionality.

/OEWB/P_NOFX      X     OEWB: Changes Possible Without Fixing – this has to do with “fixing” which locks the BOM as it currently is, and can only be changed manually going forward.  This is also used in conjunction with adding a material below a configurable material.

/OEWB/P_NORF     X      OEWB: Changes Without “Really Fix” – this is used in conjunction with P_INST & P_EXPL.

/OEWB/P_OBOM     X     OEWB: Entry with Order BOM Instead of Version

/OEWB/P_SAVE       X     OEWB: Save Without Leaving – this one is a pretty obvious.  If this isn’t set to X, then everytime you save, you leave the /OEWB/MAIN screen.

/OEWB/P_COAD              OEWB: Copy with Advanced checks – If this parameter is switched on, the configuration (of configurable materials) is copied and manual changes (insert, edit, delete of BOM items) of the source object are copied to the target. This also works multi level.  As a prerequisite, the functionality does just work if parameter “/OEWB/P_EXPL” is NOT set.  This parameter shall also influence copy of version data.

/OEWB/P_MATV              OEWB: Type Matching – this will allow type matching to occur within the OEWB.  This is likely to only be used for instantiated components.

Now some of these parameters I’m still trying to figure out, but not having access to the OEWB in my own system has made this challenging.  If I get a chance to get back into the system, I’ll add more details to these, but for now, at least you have my initial notes of the recommended settings (any of the items with an X).

Thanks for reading.


Variant Configuration – Activating the IPC

Once again, I have to give special thanks to my good friend Jeremy.  He pointed out something in my previous post that I didn’t even realize.  It turns out that I don’t need to install anything special for activating the IPC.  Jer pointed me toward OSS Note:  854170 which points out that the IPC needs to be activated, rather than any additional installations.

The OSS Note tells you to activate the parameter in RZ10 (remember, you will need to restart your server in order to implement the change).

vmcj/enable = on

In addition, Jer also gave me this screenshot to show the installation instructions (but honestly, it’s barely needed).

I confess that I haven’t had a chance to go very far with this yet, and I have yet to find out if I can use the advanced mode functionality inside of ECC, but as soon as I get a little time, I’ll let you all know.

Thanks for reading,

ABAP – SIMGH for IMG Cleanup

Well, recently, I was doing some prep work/clean up for my upcoming Field Service Engineer Web application.  I intend to reuse as much code as possible from my Rapier application.  In the course of my cleanup, I ran into an issue.  I had created some custom IMG nodes in configuration, and subsequently deleted them in order to clean up some of my export packages.  Well, short story, deleting the nodes didn’t delete all of the underlying pieces.  One of my tables was showing a where used for the IMG node that was already deleted, so I need to use SIMGH for IMG cleanup.

What I found is that since deleting the node didn’t delete the underlying pieces, the only alternative was to find those pieces individually, and delete them.  Transaction SIMGH did for me what S_IMG_EXTENSION couldn’t.  You see, I did all of my creation and deletion using S_IMG_EXTENSION, and for some reason, S_IMG_EXTENSION doesn’t properly clean up after itself.  So my word of warning is that if create your own custom IMG nodes using S_IMG_EXTENSION, be careful if you do any deletions, and be sure to use SIMGH to validate your work.

Thanks for reading,


Service Management – Master Warranty pt 4

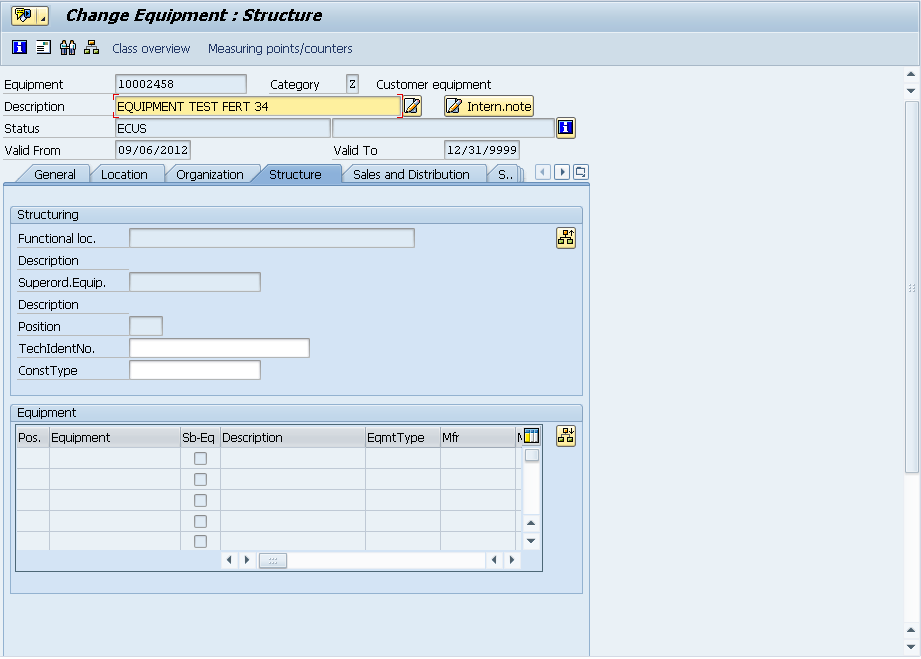
This is the last part of the SAP Service Management Master Warranty.  So far we’ve gone over all of the configuration to use the master warranty, and we even created a master warranty, but so far, it still means nothing.  Today we’ll go over how to use all the pieces we’ve created so far.

In this screen shot, I’ve shown an equipment record (transaction IE02).  Keep in mind, your equipment may look different, but the important piece is the customer or vendor warranty section.  If you currently do not have these fields shown, you’ll need to configure the equipment record to include those sections.  Once there, you must enter a begin guarantee date (this is your warranty start date).  From here, you either enter in the warranty end date, which is the most straightforward way to enter in the warranty.  The other option, is our master warranty we created (this is shown in the screenshot).  Now, you may be asking me…  why use the master warranty if it’s just date related?  The biggest reason to use the master warranty is that you don’t need to worry about the exact end date.  You just pick the master warranty, and it figures out the end date.  It makes life easier for any sort of automation you might wish to use, in order automatically assign the correct start and end date.  Of course, if you do anything other than time related, you must use the master warranty to handle this…  now back to the show 🙂

Now, if your master warranty includes anything not time related, you must use measurement documents.  First, press the measurement/counts button and you will then see the screen shown above.  I’ve shown you the populated version.  Notice that WTY_USAGE_HOURS is the characteristic name.  The rest, I’ll save for another day to go into all the details of the measurement docs.  Be sure to save this and then we can move to the next step.

Now, we move to transaction IK11.  This creates the first counter or measurement.  In the example shown above, you can see that on 5/7/2013, the reading was 5.  As long as it’s less than 1000, it’s still under warranty.  Normally, you collect the measurements on a regular basis, weekly, monthly, etc…

Now, once you enter in the measurement/counter, you can go back to IE02/IE03, and see the status of of warranty.  Notice, the little check mark which means it’s still under warranty.  You can even see the complete details by pressing the puzzle piece next to the status.

The last 2 shots show the the full details of the warranty.  You can see the difference between line 1 which is date dependent, and line 2 which is counter related.  All of this same information can be seen if you enter this piece of equipment on a service notification.  I hope these lessons have enlightened you on using the master warranty.  Watch for another series in the future on some more advanced topics related to warranties, measure documents, etc…  and just as a teaser…  Rapier now includes the ability for your customer to see their customer or vendor warranty and the full status for each piece of equipment they have registered.  Thanks for reading and if you want more great tips like these, check out my Service Management E-Course.


Service Management – Master Warranty pt 3

In the last post, I finished the configuration portion of the SAP Service Management – master warranty series.  Now, that leaves us with the “important” part.  Setting up the master data and using it.  That’s what the next 2 lessons will cover. Today I’m going to talk about creating a master warranty.

TXN: BGM1 (like always, 2 is change, 3 is display)

Unless you choose to use the external number range, you can leave this field blank and simply hit enter.  The system will come up with the next available number for you.

Now you’re looking at the initial screen (after I filled in the basics).  Let me just touch on these fields.  If we look at the header section, you’ll notice there are several fields filled in.  Like everything, a description is needed.  Next you choose if this will be a customer or a vendor warranty (if you have any concerns or other options, see my previous posts on the configuration).  I also checked the pass on warranty box.  This simply says that I want to pass this warranty onto any sub-equipment records below this one.  It goes back to the inheritance of the warranty.  The remaining fields are sort and text type fields.  They aren’t required, and may never be needed.

Now we get to the heart of things.  When you look at the Services tab, you must enter at least one service.  Think of an entry in this section as a warranty “grouping”.  Each enter you post here is a service material, so you will need a DIEN or similar material master to exist.  In a master warranty, you can add as many materials as you like here, and can assign characteristics for each material.  This comes in handy for example if all service “time” is covered under warranty, but only certain materials are covered under warranty, you could list those out individually.  Once you enter you material(s), you will need to highlight each one, and select the count tab.

The count tab is truly where the magic happens.  In my example above, the warranty1 material will be true if it is inside of 24 months (characteristic 1) or the Usage Hours is less than or equal to 1000 hours.  The first line is purely time dependent (remember the flag we set in config for time).  The 2nd characteristic will be based on measurement documents since this is the only way we can know this value.

At this point, we can save or repeat the count tab for each remaining material we entered in the first tab.  Next time, we’ll show you how to add the master warranty to an equipment record.  Thanks for reading.


Posts navigation

1 2 3 75 76 77 78 79 80 81 96 97 98
Scroll to top